To continue in the Bible Verse calendar, here are downloads for the month of February in three versions, ESV, KJV, and NIV.
As you can imagine, this month’s theme is love and the verses are full of great verses on the love of God and showing love to others. I hope they are an inspiration to you in the following weeks. FYI, the black and white headshots are of Presidents Lincoln and Washington on their respective birthdays.
Instructions:
Download the .pdf file below.
Print onto white 8.5 x 11 card-stock (other colors might be ok, but you’ll have to test that out yourself).
Cut along the dotted lines then sort into numeric order.
Prop up on a little stand, or keep in a drawer and swap out on the fridge. Or buy a recipe box with a ridge in the top for easy reading.
Keep in a prominent place where the members of the household will easily see it. The kitchen table is good, if you have breakfast there.
Discuss verse(s) with family and encourage reading the surrounding verses for context and meditation throughout the day.
Enjoy! Oh, and subscribe to this blog to the right if you’d like notifications of new posts and the next of these printables. I promise not to overwhelm your inbox. 🙂
To continue in the Bible Verse calendar, here are downloads for the month of January in three versions, ESV, KJV, and NIV.
I really enjoyed putting these together. The verses are such an encouragement (and a chastisement where necessary) for strong Christian living – in mercy, kindness, and love. I hope it blesses you as well.
Instructions:
Download the .pdf file below.
Print onto white 8.5 x 11 card-stock (other colors might be ok, but you’ll have to test that out yourself).
Cut along the dotted lines then sort into numeric order.
Prop up on a little stand, or keep in a drawer and swap out on the fridge. Or buy a recipe box with a ridge in the top for easy reading.
Keep in a prominent place where the members of the household will easily see it. The kitchen table is good, if you have breakfast there.
Discuss verse(s) with family and encourage reading the surrounding verses for context and meditation throughout the day.
Enjoy! Oh, and subscribe to this blog to the right if you’d like notifications of new posts and the next of these printables. I promise not to overwhelm your inbox. 🙂
If you remember, from last month, I posted some freebie downloads for a Bible verse calendar for November. To continue, here are downloads for the month of December in three versions, ESV, KJV, and NIV.
Some of these verses are truly golden ones for the beautiful time of year we celebrate Jesus’ birth. I hope you enjoy these as much as the November ones.
Instructions:
Download the .pdf file below.
Print onto white 8.5 x 11 card-stock (other colors might be ok, but you’ll have to test that out yourself).
Cut along the dotted lines then sort into numeric order.
Prop up on a little stand, or keep in a drawer and swap out on the fridge. Or buy a recipe box with a ridge in the top for easy reading.
Keep in a prominent place where the members of the household will easily see it. The kitchen table is good, if you have breakfast there.
Discuss verse(s) with family and encourage reading the surrounding verses for context and meditation throughout the day.
Enjoy! Oh, and subscribe to this blog to the right if you’d like notifications of new posts and the next of these printables. I promise not to overwhelm your inbox. 🙂
Ok, the clip-art is kind of cheesy, but I did all of that chevron by myself! (Go old school Microsoft Paint!)
This all stems from wanting to have a daily verse calendar like the one my grandparents have had for years. Theirs flips over and has verses on the front and back. I couldn’t really come up with a way to do that without a stand, so I grabbed a bunch of index cards and got writing. I found a great daily verse list here. It’s very cool how they arranged them to align with certain holidays and themes. I was impressed.
You should be too. I put my hand into very, very painful writer’s cramp putting this out. I found a recipe card box with a ridge on the top, that would fit all of the cards. 365 cards. Quite a feat.
Then, I got to thinking that this would be a fun thing to share with others. I love coming into my kitchen in the morning, while I’m letting my Keurig heat up (who has time for a real tea pot anymore!?) and pulling out the day’s Bible verse. My handwriting isn’t the best, so you can get yourself a prettyfied pdf color version.
The plan is to do the whole year…and probably include two other versions: King James Version (KJV) and New International Version (NIV). So, here is November’s list. They look like the above and below, but four to a page (all but February will have 8 pages)
Instructions:
Download the .pdf file below.
Print onto white 8.5 x 11 card-stock (other colors might be ok, but you’ll have to test that out yourself).
Cut along the dotted lines then sort into numeric order.
Prop up on a little stand, or keep in a drawer and swap out on the fridge. Or buy a recipe box with a ridge in the top for easy reading.
Keep in a prominent place where the members of the household will easily see it. The kitchen table is good, if you have breakfast there.
Discuss verse(s) with family and encourage reading the surrounding verses for context and meditation throughout the day.
Enjoy! Oh, and subscribe to this blog to the right if you’d like notifications of new posts and the next of these printables. I promise not to overwhelm your inbox. 🙂
This has been a week! The Huz has been on the awful second shift at work, so I’ve had my evenings free. Evenings to get into some mischief. Mischief which includes decorating The House and making soup from scratch.
Yep. My kind of mischief.
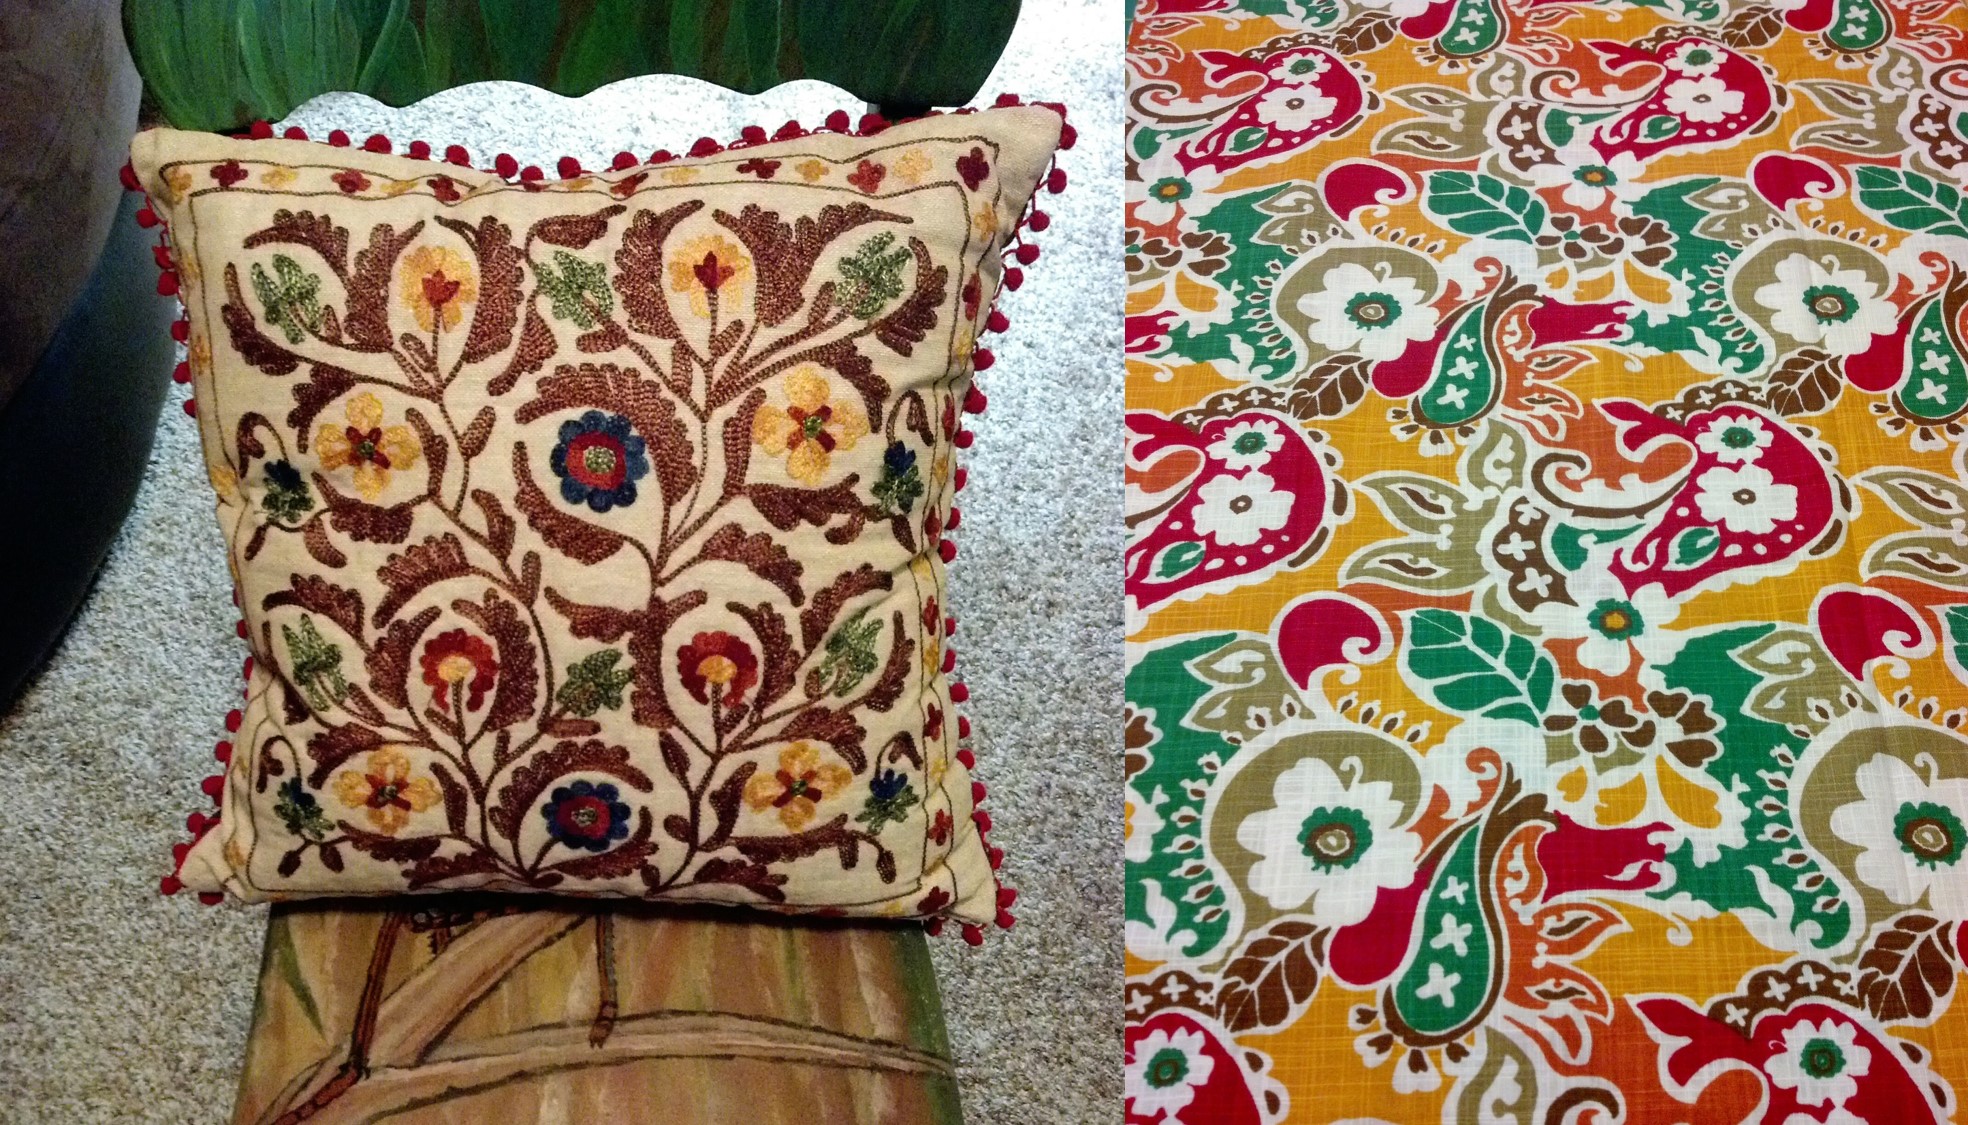
I drove over to Pier 1 the other day because we had a $25 gift card for there AND they had a 10% off coupon on their website. I went to look for a thin shelf or a small table for the end of the hallway, but ended up leaving with some amazing curtains and a pillow to match.
Did you know that sometimes businesses will sell curtains one panel per pack???? I sure didn’t. Doesn’t seem logical.
The curtains I found ended up being one such pack. I figured that I could probably just order the other one online, but it turned out that I was accidentally more frugal than I thought and got a pattern that was on clearance. The closest one was about 2 hours away in Columbus, OH. I opted for the easy route.
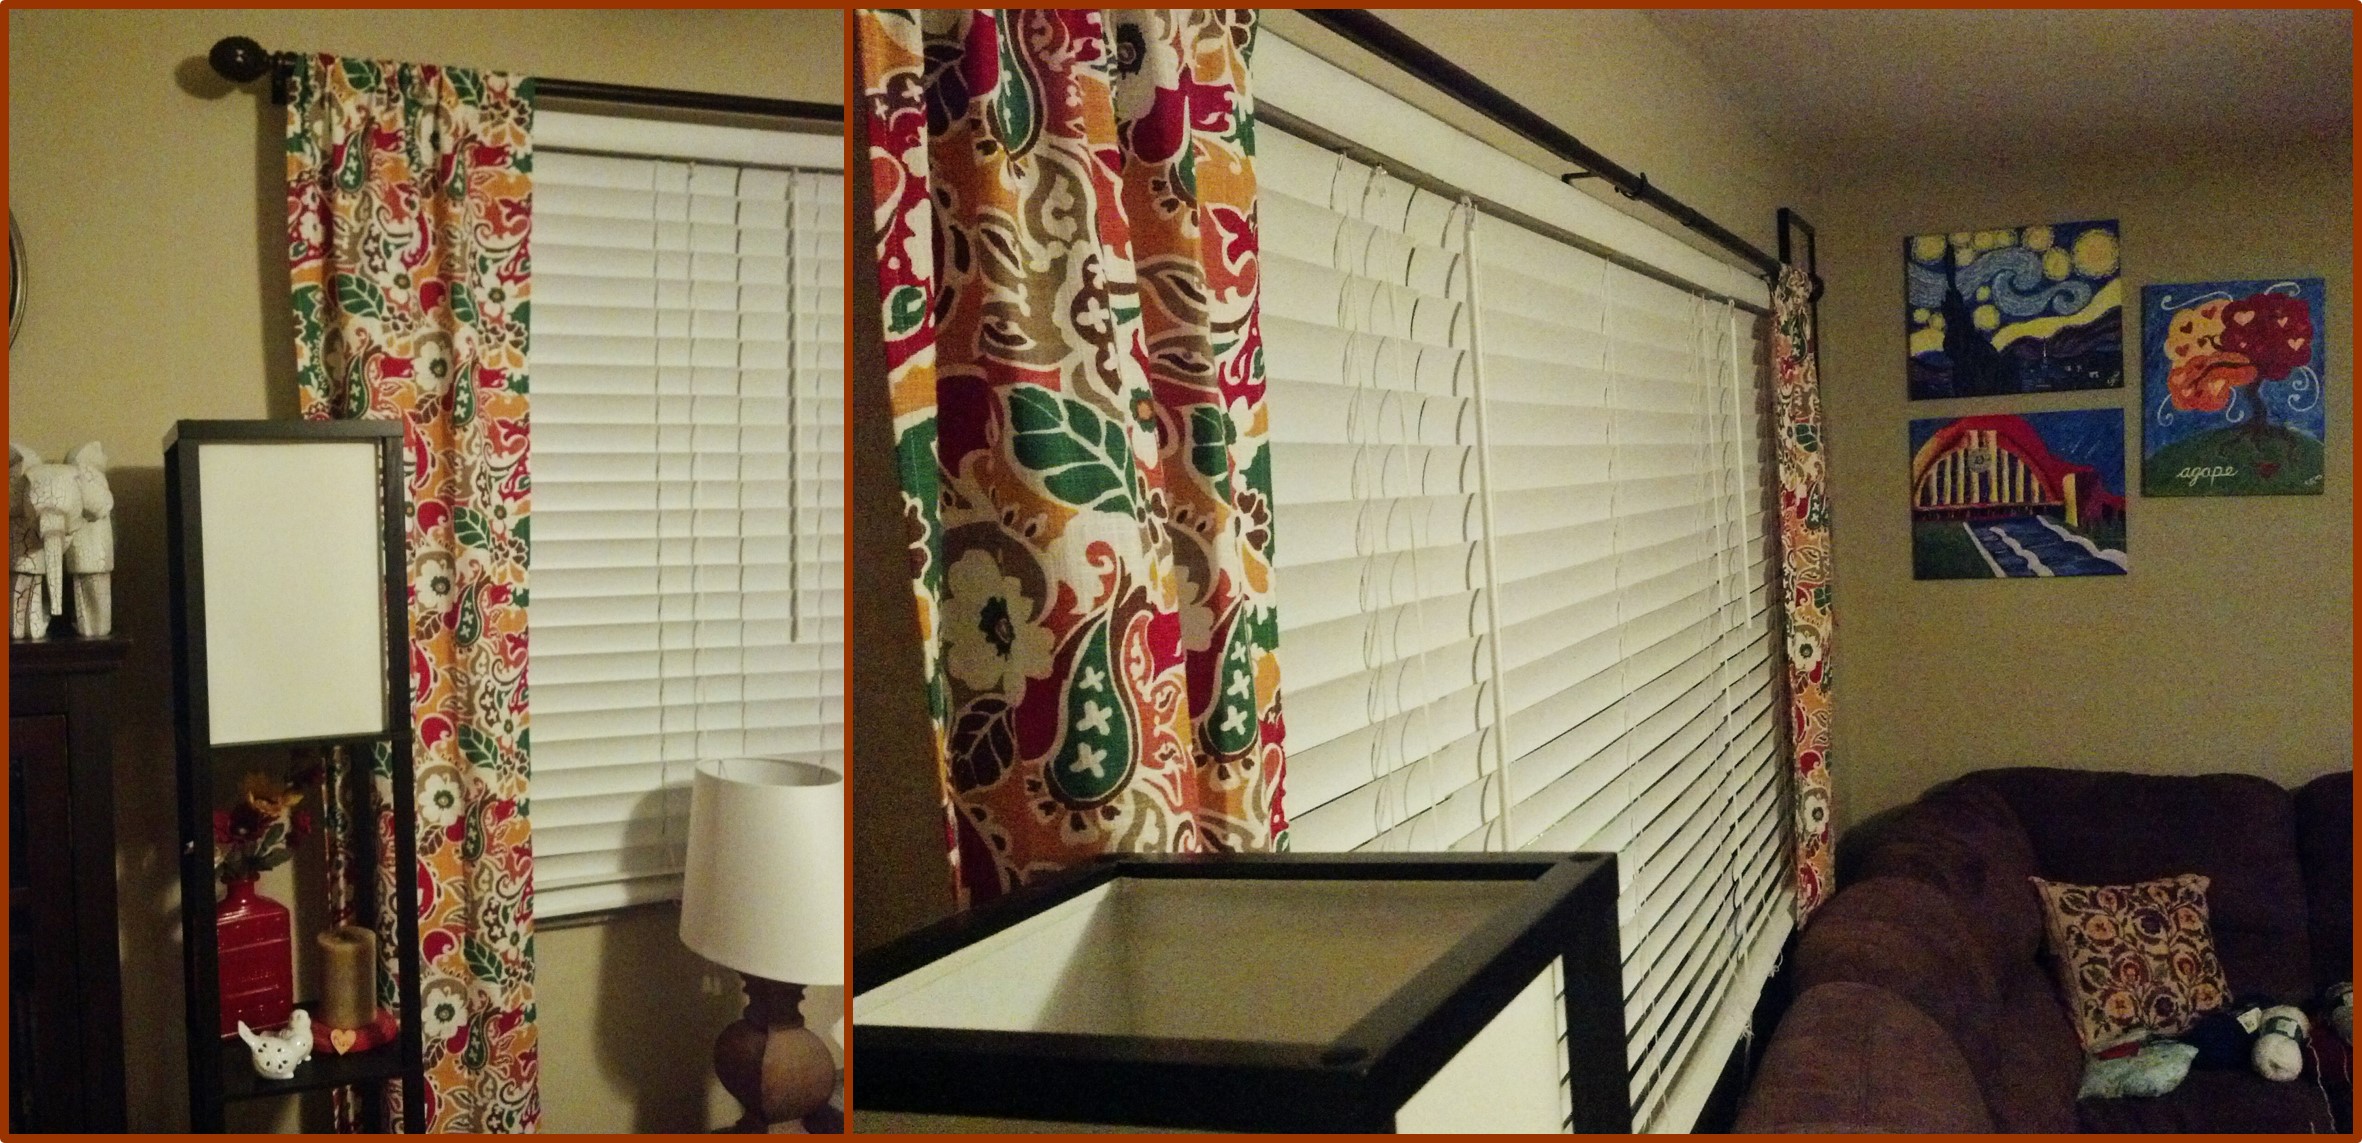
We have pretty great blinds on our windows, so I was looking for the curtains for color and accent rather than usefulness. The single panel was wide enough that I could make two panels myself. Got out the scissors, sewing machine, and went to town.
Oh, and that shelf I was talking about? Well, I grabbed a white one from Target (and that curtain rod) with some leftover gift cards from the wedding and spray painted it green. Nothing like a pop of color in an unexpected spot.
P.S. High Fives for awesome hubbies who will hang shelves and curtain rods on their mornings before they go to work. I love our teamwork.
————————————————-
And now for the soup!
A man at church was giving out bags of spinach from his garden. It looked soooo good. I couldn’t say no. We had picked up some sugar pumpkins at a nearby dairy farm and I have been aching for an excuse to hack into them. I found this recipe online and I’m only posting it as a reference to my starting point. I did things differently, but included most of the same ingredients. The original recipe is more for a creamy soup, since it calls for turning all the veggies into a puree. Also, I added chicken to mine, because I can’t get away with giving something without meat to the Huz.
Pumpkin Spinach Soup
Ingredients
2.5 lbs chicken breast, cubed (smaller pieces are better)
1 sweet onion
3 cups of cubed pumpkin (can be varied sizes, this is intensive) It took half a sugar pumpkin for me, probably great for leftover pieces from carving. remove skin.
4 cups raw spinach
1 32 oz box of broth (chicken or vegetable is fine. I used chicken)
2 cups water
1 tbsp butter
2 medium-sized tomatoes
2 cloves garlic
1 tbsp ginger
1 tbsp cinnamon
1 tsp turmeric
1/2 tsp coriander
1/4 tsp nutmeg
pinch of red pepper flakes
1 can of pumpkin puree
1 tbsp olive oil
Directions
Prep the pumpkin by removing the seeds and stringy innards and cutting apart the sides. As stated before, this is intensive and can take quite some time. There are easy ways to remove the skin by using wet paper towel and sticking them in the microwave. I was short on time, so, I just cut away, dicing as I went and then cutting the skin off at the last. (Fun side project: as you pull out the seeds, toss them into a colander and rinse. Be sure to get all the gunk off of them, then set aside between paper towels to dry – recommended dry time is one day. Toast later!)
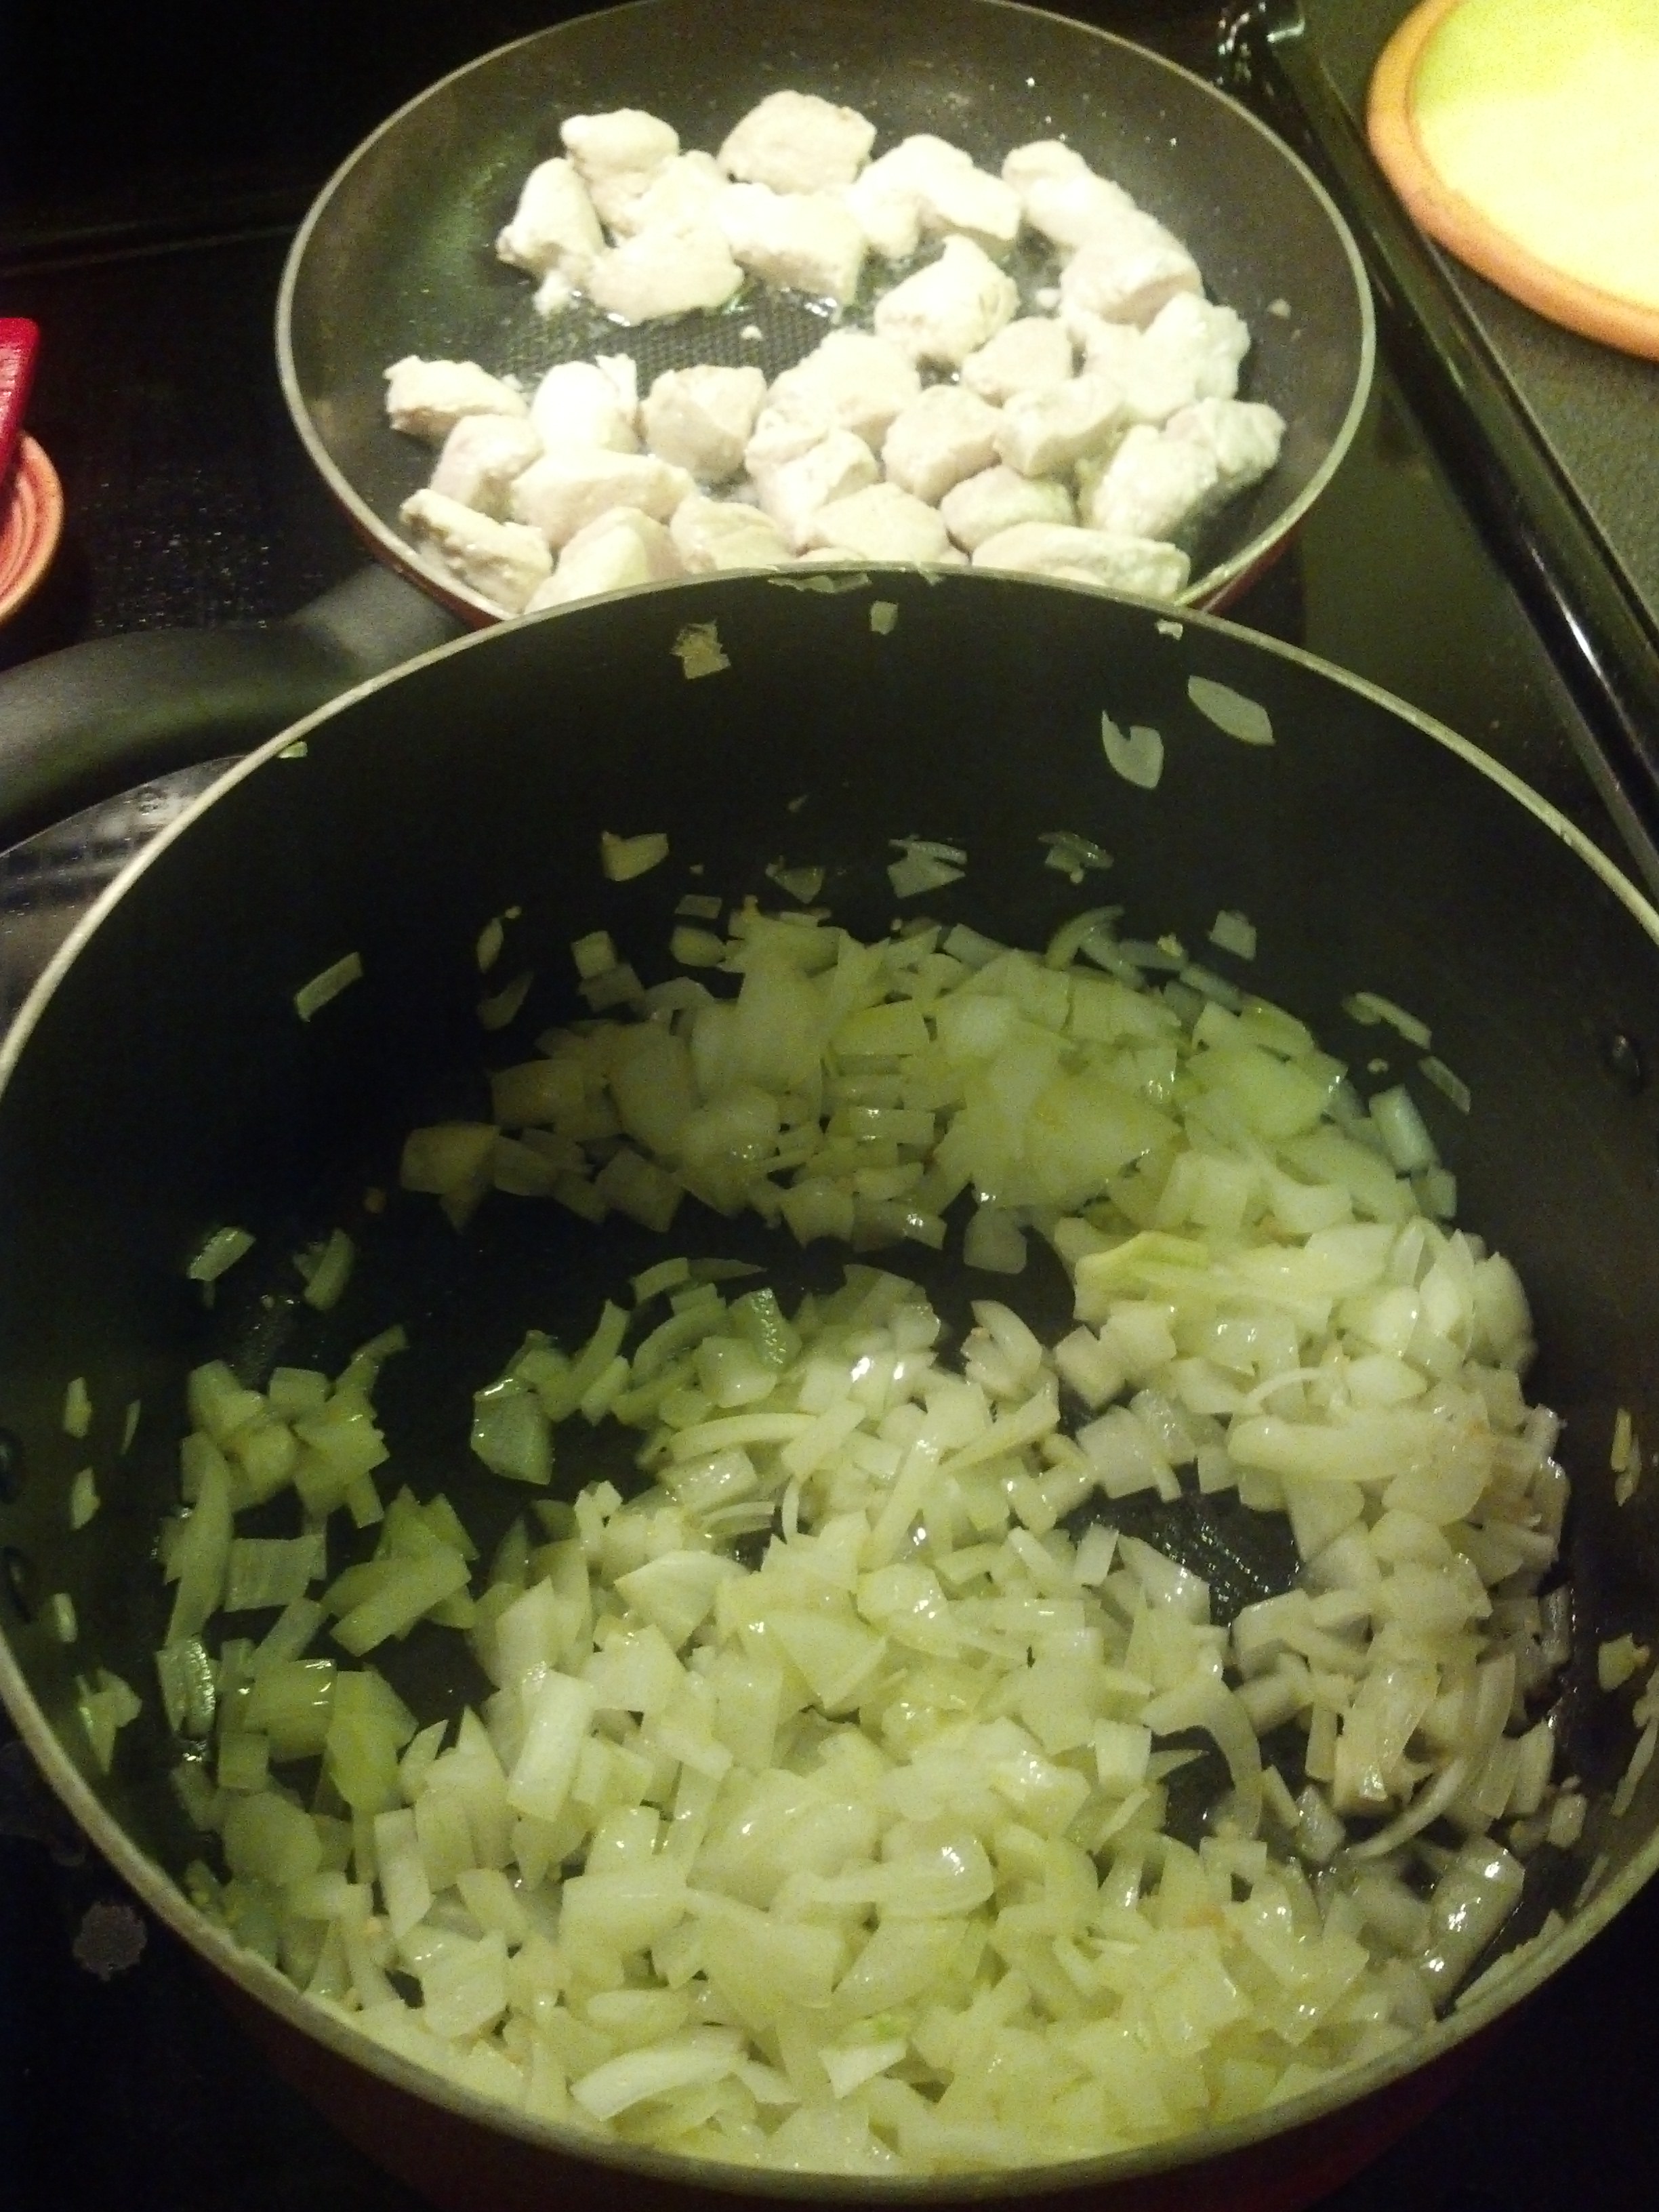
Dice the onion and garlic. Saute them in butter in a large pot on the stove over medium heat until the onion turns translucent.
In a pan, cook the diced chicken until white on all sides. Set aside while the soup is prepped.
Once the onion is cooked, add the pumpkin, diced tomatoes, broth, water, pumpkin puree, chicken, and spices. I cut back one some of the spices because I wasn’t using as much liquid, but feel free to go at it. My end result was a very mellow flavoring, but pleasant. The Huz can’t handle stuff that’s too spicy. (If you’re still cooking the chicken or cutting tomatoes, just add as you have it ready. This part is pretty flexible.) Add more water as needed to cover all the ingredients. Stir then cover the pot. Bring the mixture to a boil, then reduce to a simmer.
Cut up the spinach and toss into a pan to cook until it wilts. Check that the vegetables in the soup are tender. The pumpkin should have a potato-like consistency. In fact, the Huz thought they were potato until I told him it was pumpkin. Score! If the veggies are tender, stir the soup and add spinach.
I apologize for the lack of times in this recipe. I was given none, and since I spent a lot of time cutting my pumpkin while the soup was already going, I can’t remember how long it actually took me. All I know is that this soup has all the feel of gourmet. If I could do it all over, I would have chopped up more chicken and chopped it up smaller (I did not use the above listed 2.5 lbs.) You can also do this without any meat, but you would probably need to add more pumpkin chunks to compensate.
Anyway, I discovered that potentially the best thing about cooking (soup in particular) is that you can take a recipe and make it your own. You can’t really do that with baking. I love my rules and parameters a lot, but I liked being free to improvise a bit with this recipe.
This batch made enough for me to freeze half of it in a gallon freezer bag and still have servings for myself and my husband for probably three nights. I know what I’m packing for lunch!
——————————————
Side Notes:
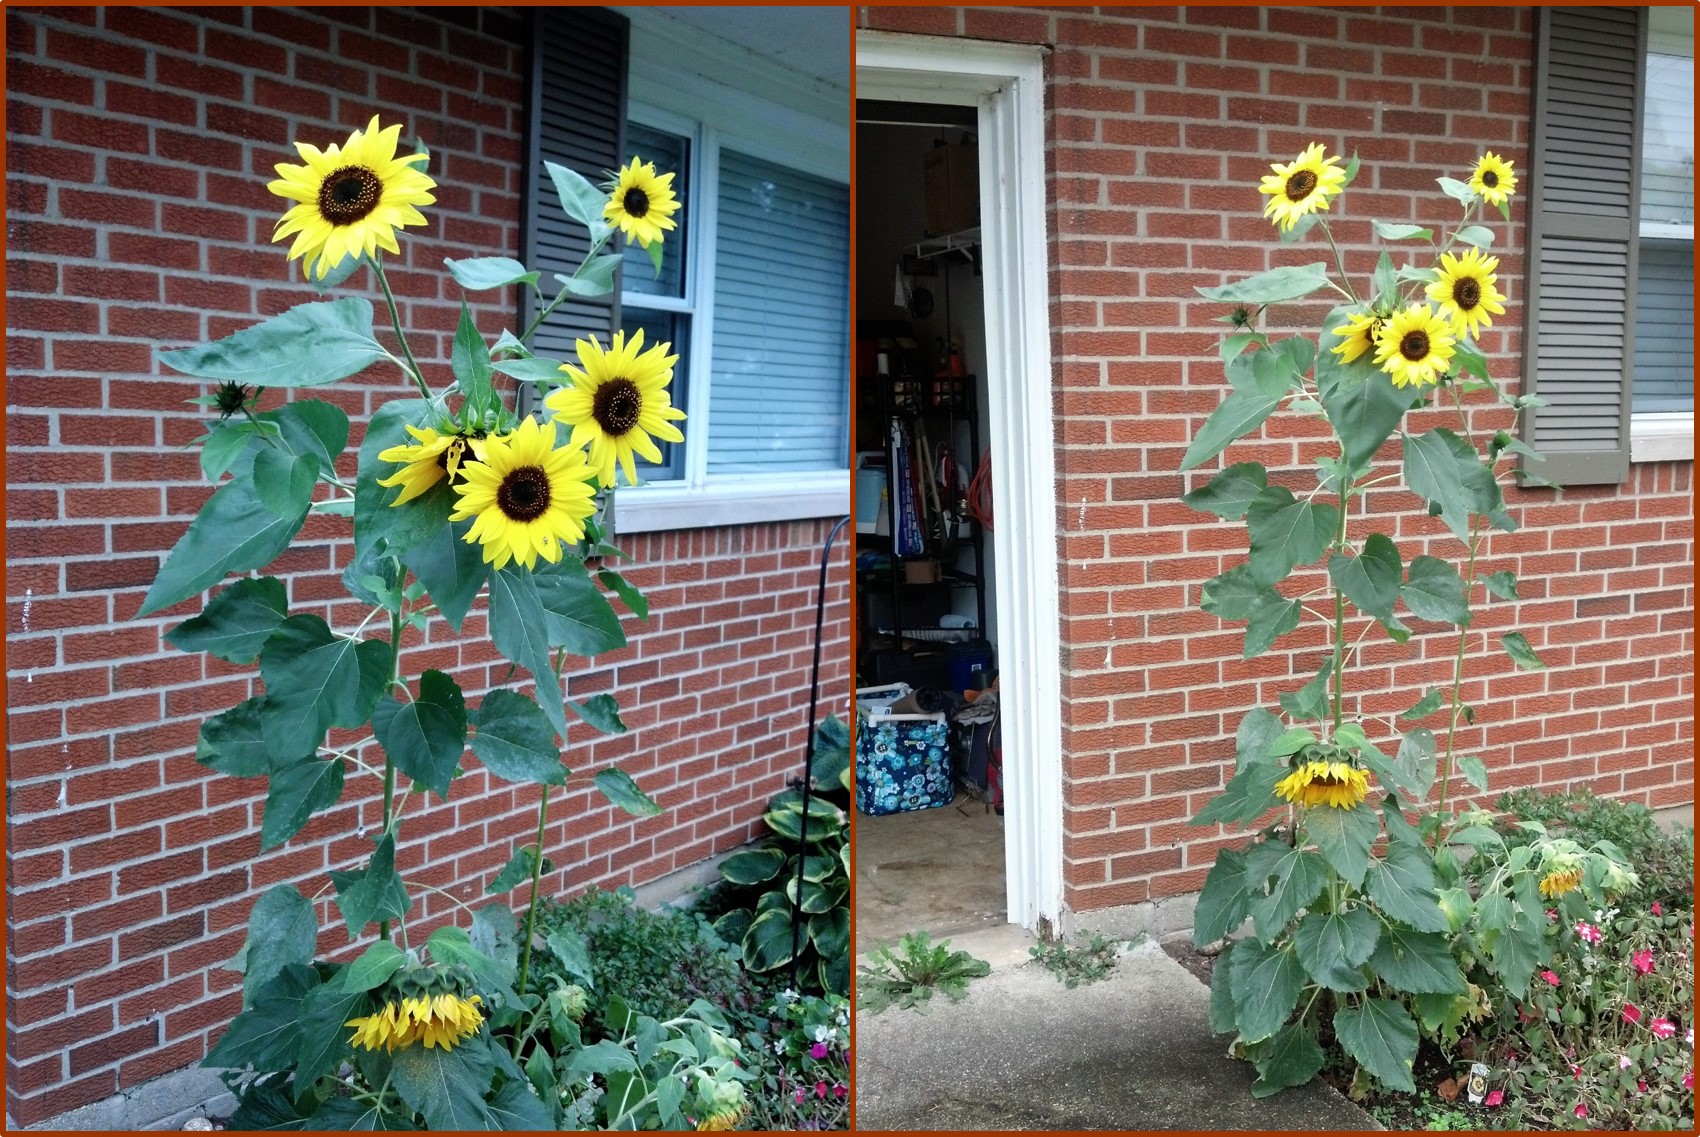
So this is happening right now, in our front garden. Those suckers were all supposed to be less than 3 feet tall. 4 absolute max. I’ll be harvesting those seeds once they keel over completely. But right now, they’re just so pretty and as it’s getting so much colder, they make me very happy.
This verse humbles me. I feel like I can keep a close watch over my mouth for the most part. I can get complainy like the rest of us, but the mouth seems to be fairly easy to keep tabs on. The heart, however, that’s a horse of a different color. Lord, help me to monitor what my heart dwells on. Out of the heart flows life and I want mine to be a life of praise and joy…not bitterness and discontent.
Pardon the poor handwriting, but I found this fabulous piece in my box of Cinnamon Toast Crunch. It’s like they know me.
I am finishing up my second week of a three-week online course for phoneography. I had never heard of phoneography before signing up, but it’s simply taking pictures with your phone. I have a fairly nice camera, but I never seem to have it in easy reach anymore. Even when I’ve got it in my purse, it’s too cumbersome to pull it out, turn it on, and set the features for the pic I want. My phone, however, is sadly always within reach. I love taking pictures, as you can see by my blog, but I feel like they’ve been missing just something.
That’s what I’ve loved about this class! I’m learning tips and guidelines for great photo-taking, not just with my phone, but especially with my phone. I’ve been learning to recognize and define what it is that I’ve always liked about certain pictures and how to prepare myself for the shot that I want.
The course is taught by Ashley at Under the Sycamore. She is fabulous and a beautiful person inside and out. I’ve been following her blog for a while now and love pretty much everything she puts out there. Not only is it great content, but the photos that accompany her entries are gorgeous! She has a whole slew of ready-models too, with their five kids and yard full of chickens. Talk about blog-envy. 🙂
So, if you are interested in an easy-peasy intro guide to good phoneography, you can sign up on her website. She also offers an online DSLR course for those with fancy shmancy cameras.
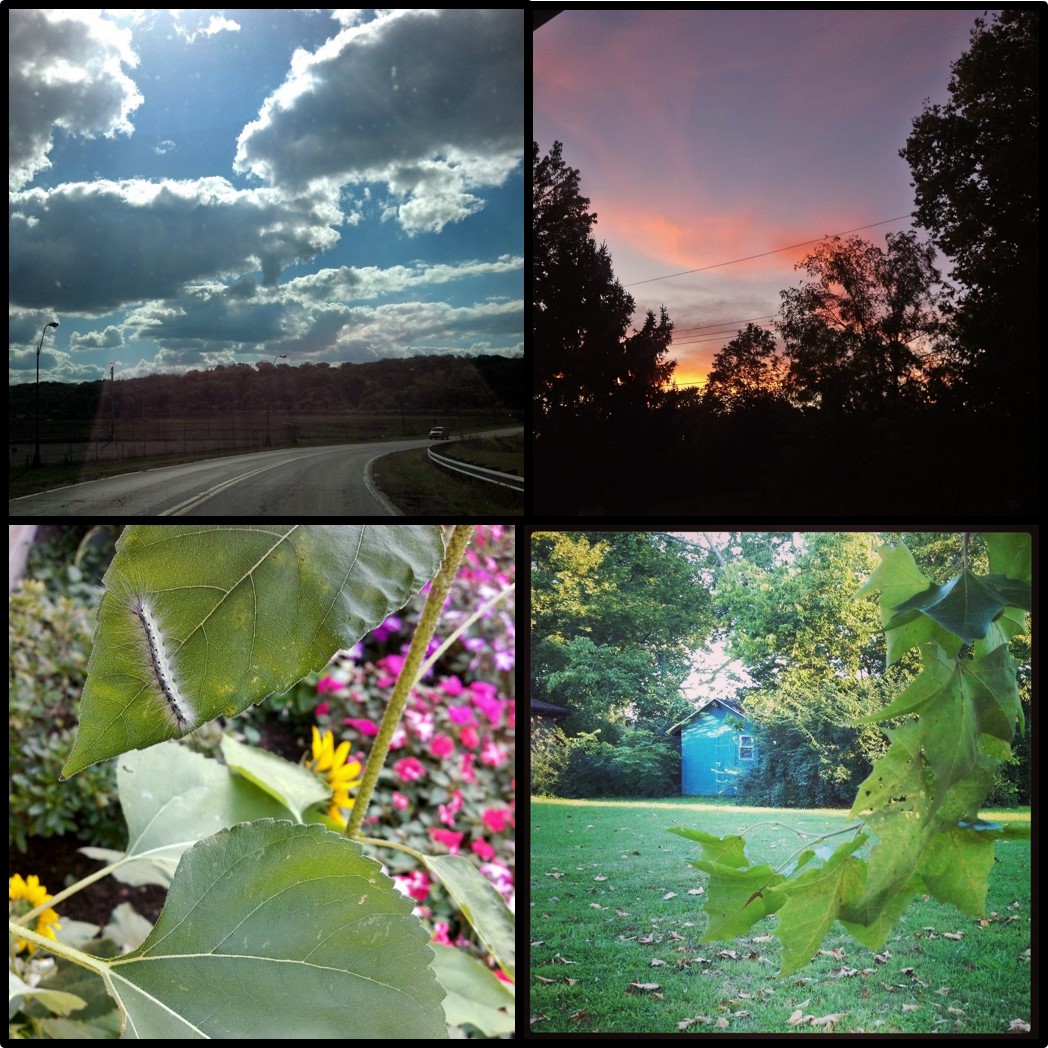
I think my favorite part of the course is the photo-sharing. This is done through Instagram. We use the hashtag #snapshopstudent and share the photos we are testing out and wanting some critique on. Not only does Ashley offer valuable advice, but the other students in the course do as well. Here are some of my photos for you (you can click on any of the images for a better look):
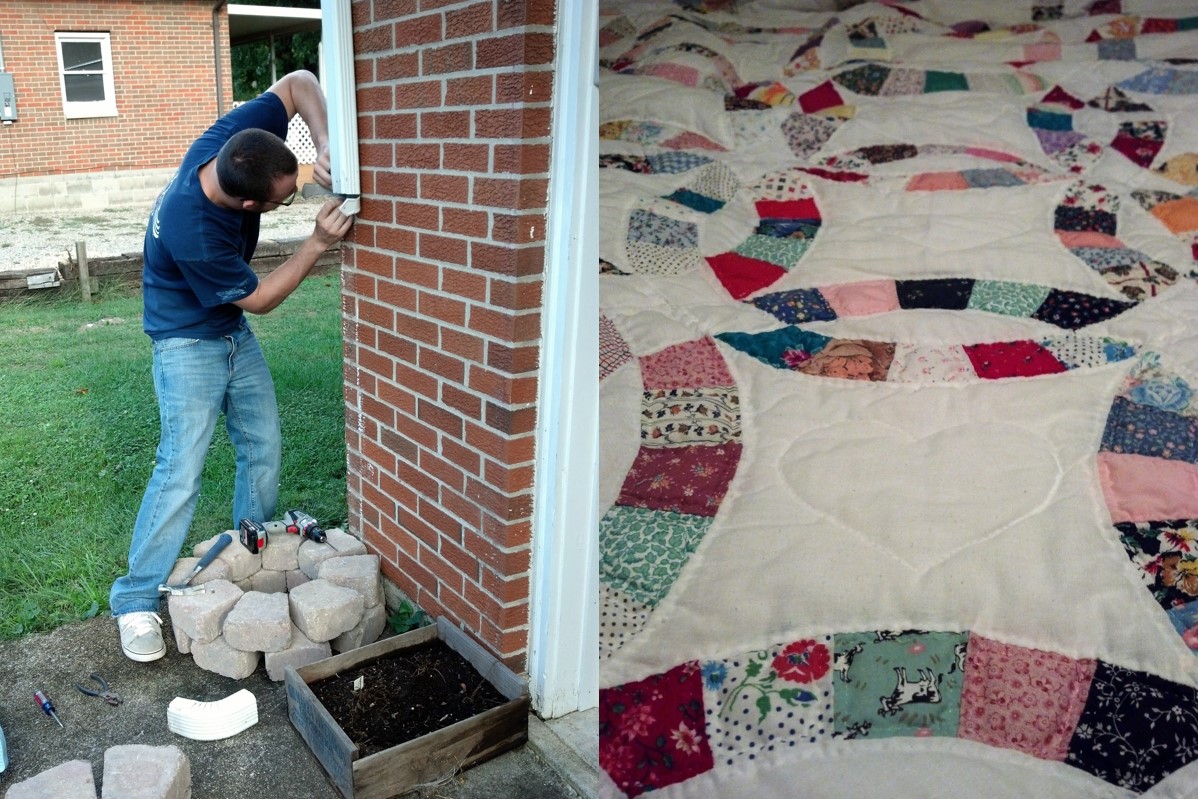
Shots around our backyard and neighbor’s yard.impatiens after the rain and a late blooming sunflowerI love my sunflowers! These are growing from the seeds we gave out at our wedding. I was very late in planting them.beautiful sky shots, caterpillar and our shedvintage sugar bowl, painted to fit in with our kitchen; windmill at a local park; niece’s soccer match.berries in the backyard and a blissful afternoon of 1 Peter and white chocolate pumpkin mocha from Cavu Cafe in West Chester.The Huz working on our rain barrel set-up and the wedding quilt his grandmother hand-stitched us.Yes, sunflowers again. 🙂around The House; rain barrel, porch rocker and pavers.
You can find me on Instagram at xapatotheworld. I look forward to seeing you there!
I had bought, a couple years ago, some photoclips handy for putting together a photo collage on the wall …or wherever…but I didn’t actually decide to use them until this week. We have a lot of empty wall space in The House, but I’ve been hesitant to put anything up until I know exactly where I want everything. It’s a catch-22, that’s for sure.
One space, though, that I did know what I want, was the wall at the end of the hallway. The space is tiny, not even 40 inches wide, but it’s tall. We only just ordered prints of all our wedding photos and I decided that I would go to town with the leftover ones that didn’t make it into the “official” photo album to show people when they visit.
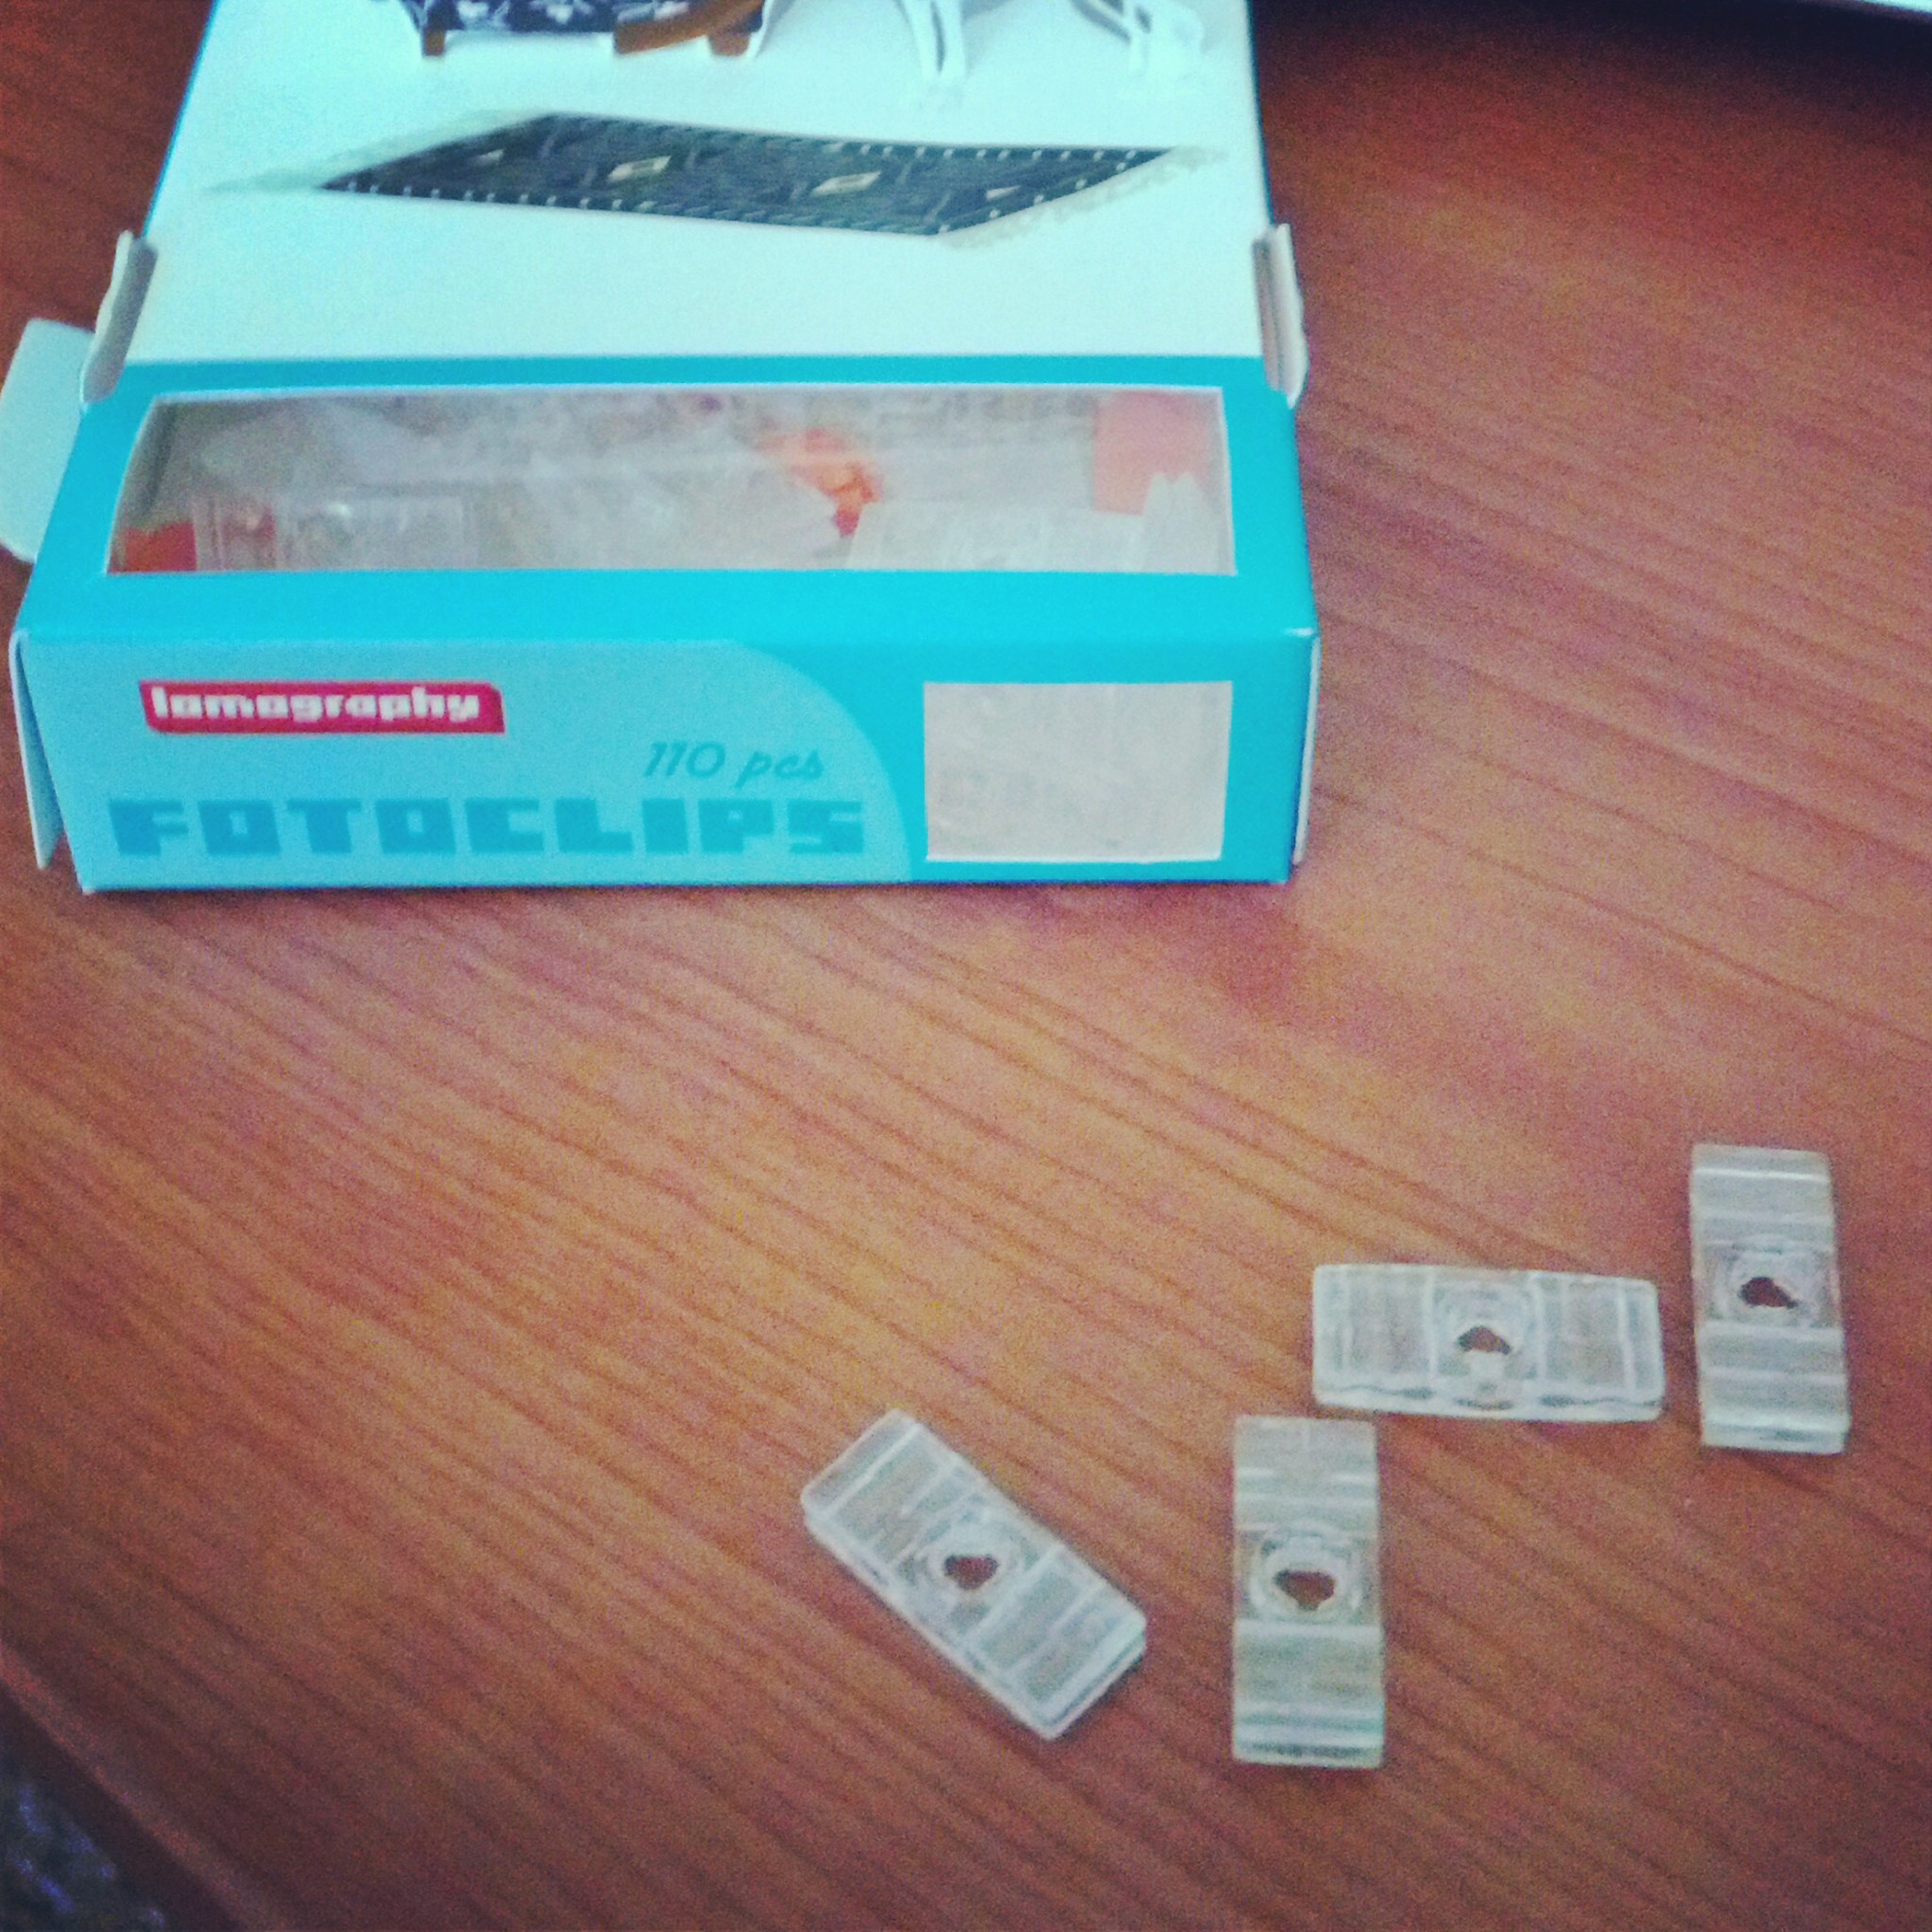
Here are the deets on the photo clips:
I used Lomography Fotoclips. They are everything that I love about an item: functional, unique, creative, adaptable, and a crazy mix of nations (Japanese, Russian, and Austrian [the Japanese might be just an inference on my part, but they feel soooo very Japanese]). I was first tipped off to them by one of the many photography folks I follow on Facebook/Instagram/etc. They put together a mural on their own wall and I loved the concept, so I bought some. They have a hole in the center for a nail for the wall, if you choose to hang up the collage that way,with two wedge openings on opposite sides that grip and connect the adjacent photos.
They grip the photos really well that I wasn’t sure I needed to anchor any clips other than the top ones, but I decided to go ahead and use some ribbon to accent and to hold them all together. Um, I’m not sure how much better I’ll be at describing these things, so you should probably just go to the link above if you’re interested. I will show how I used them below, though.
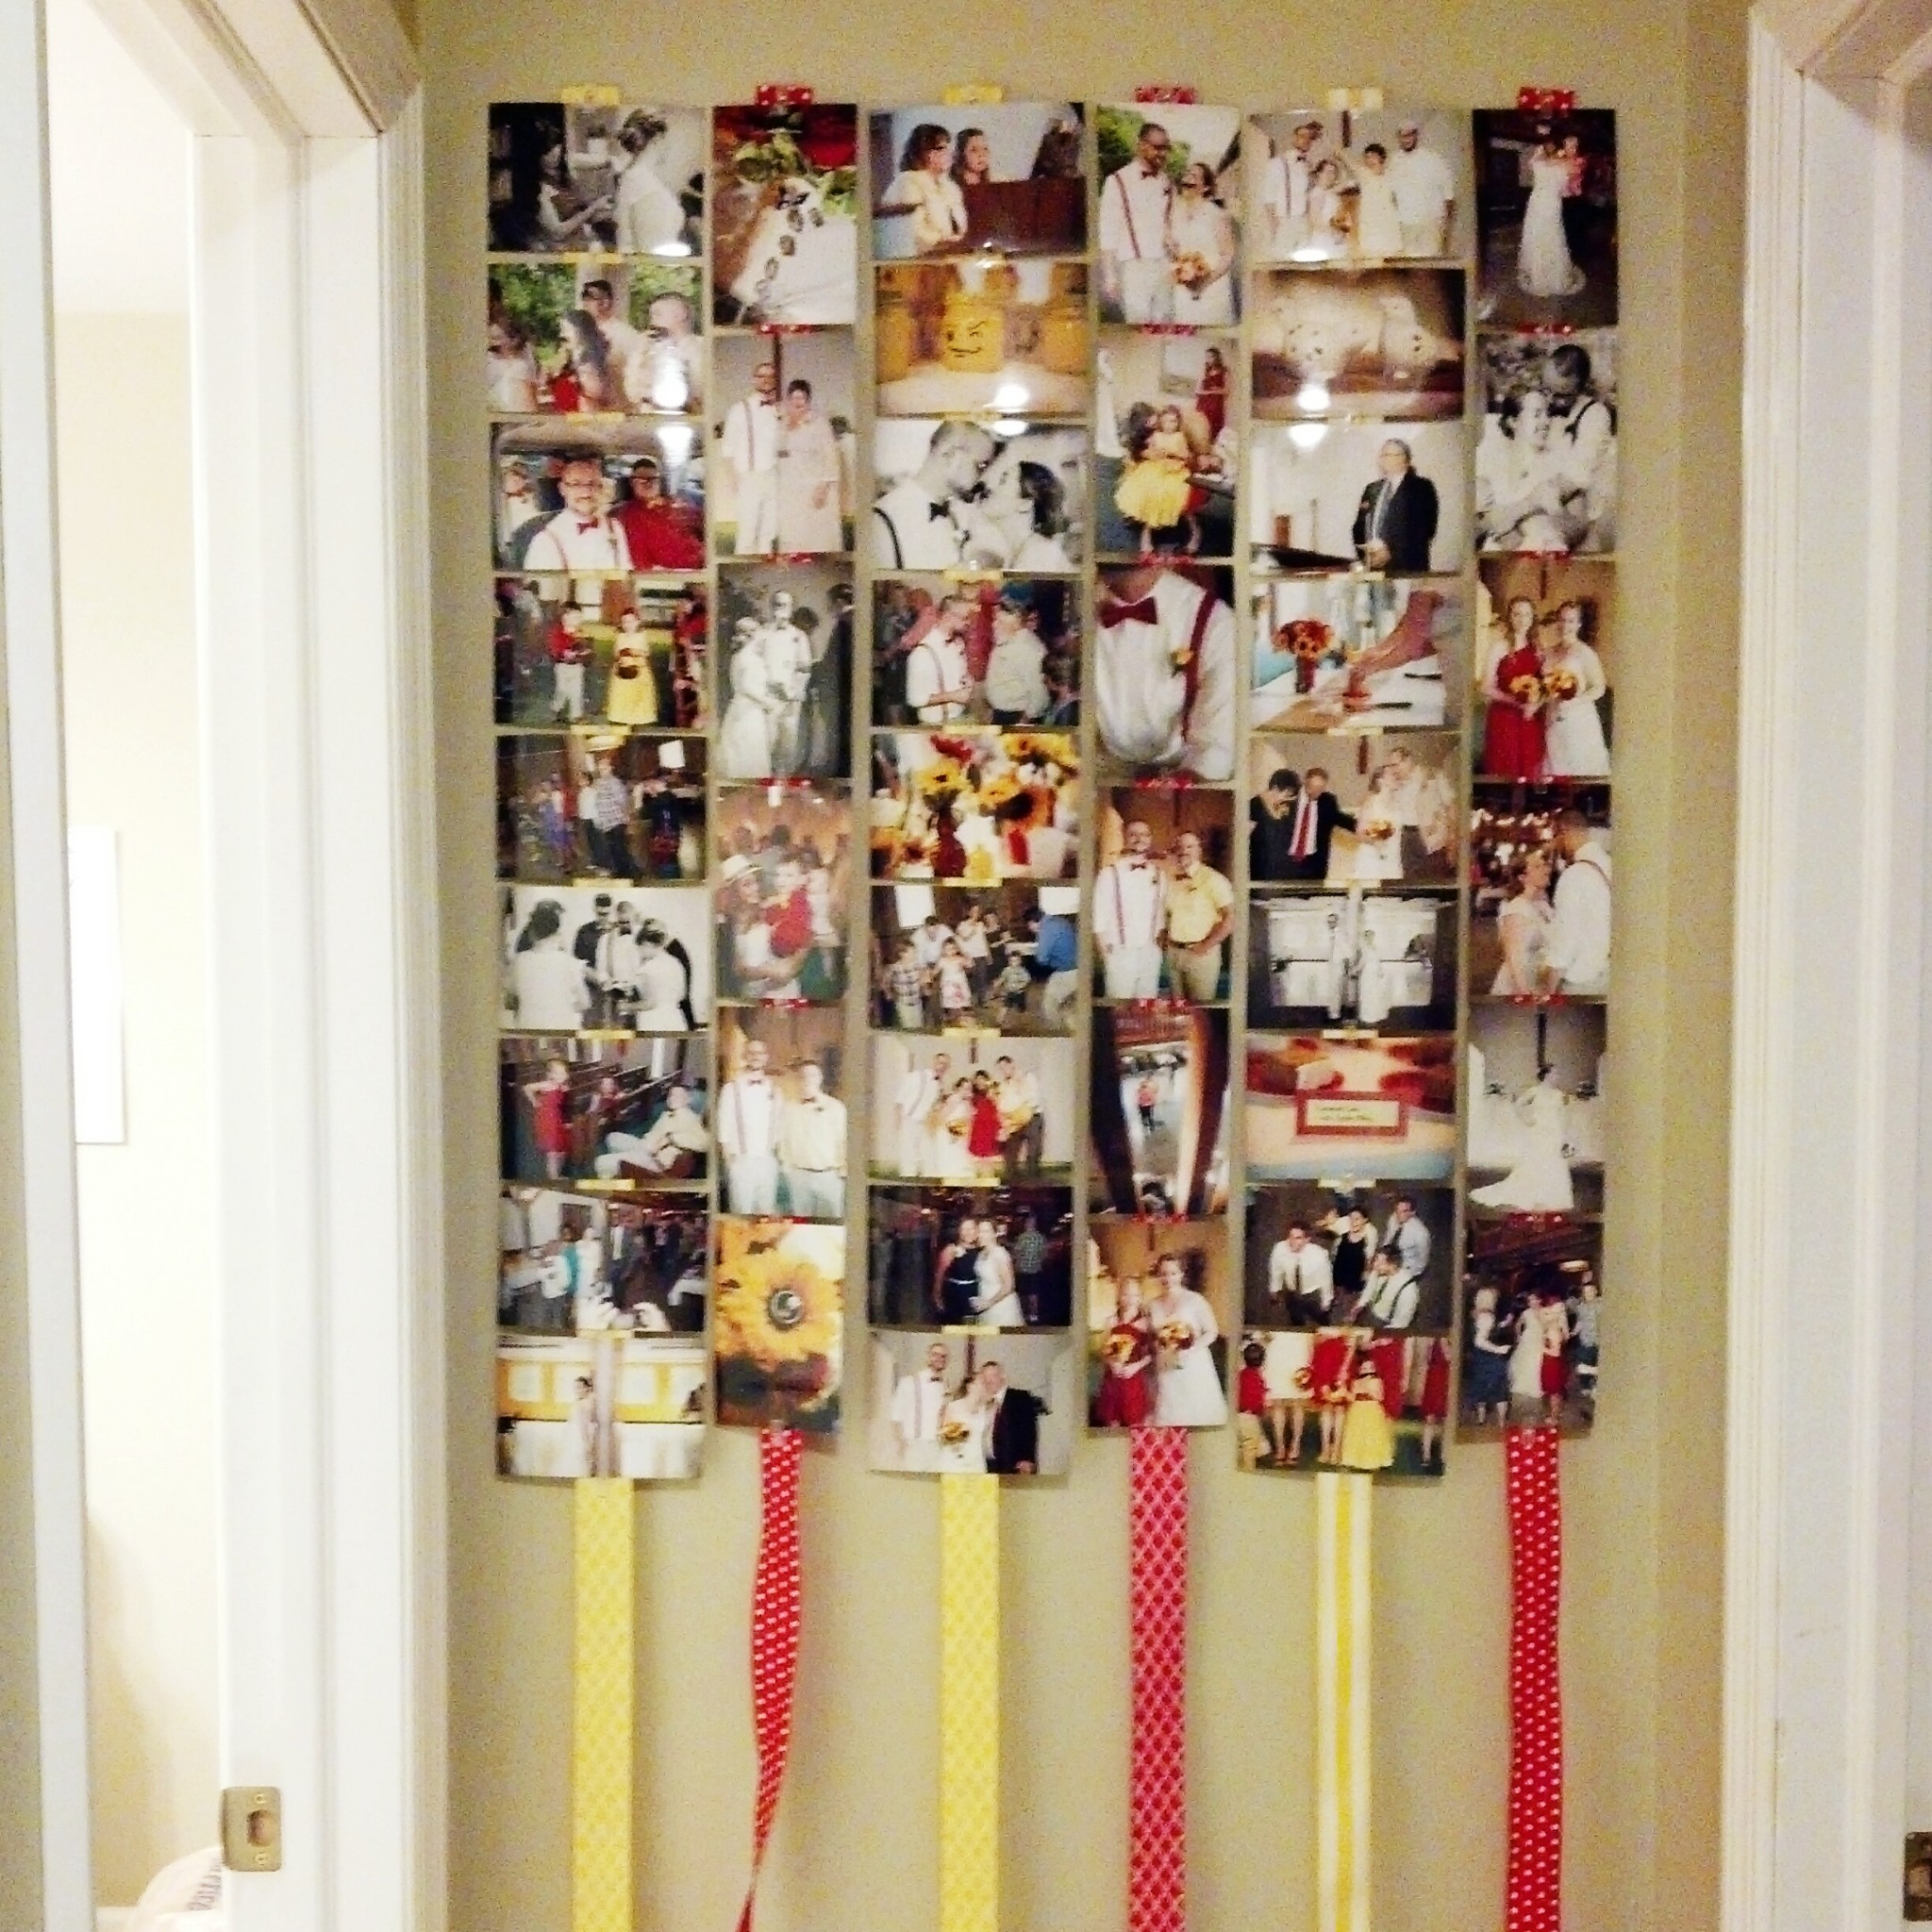
So, I began by arranging some of the pictures out on the floor. Then, I realized that I should probably measure the wall space before I arranged any more. I did, and then continued to arrange more photos. It was fun. Matt just watched and then I had to leave and then he had to go to work. Here’s the mess I left on the floor.
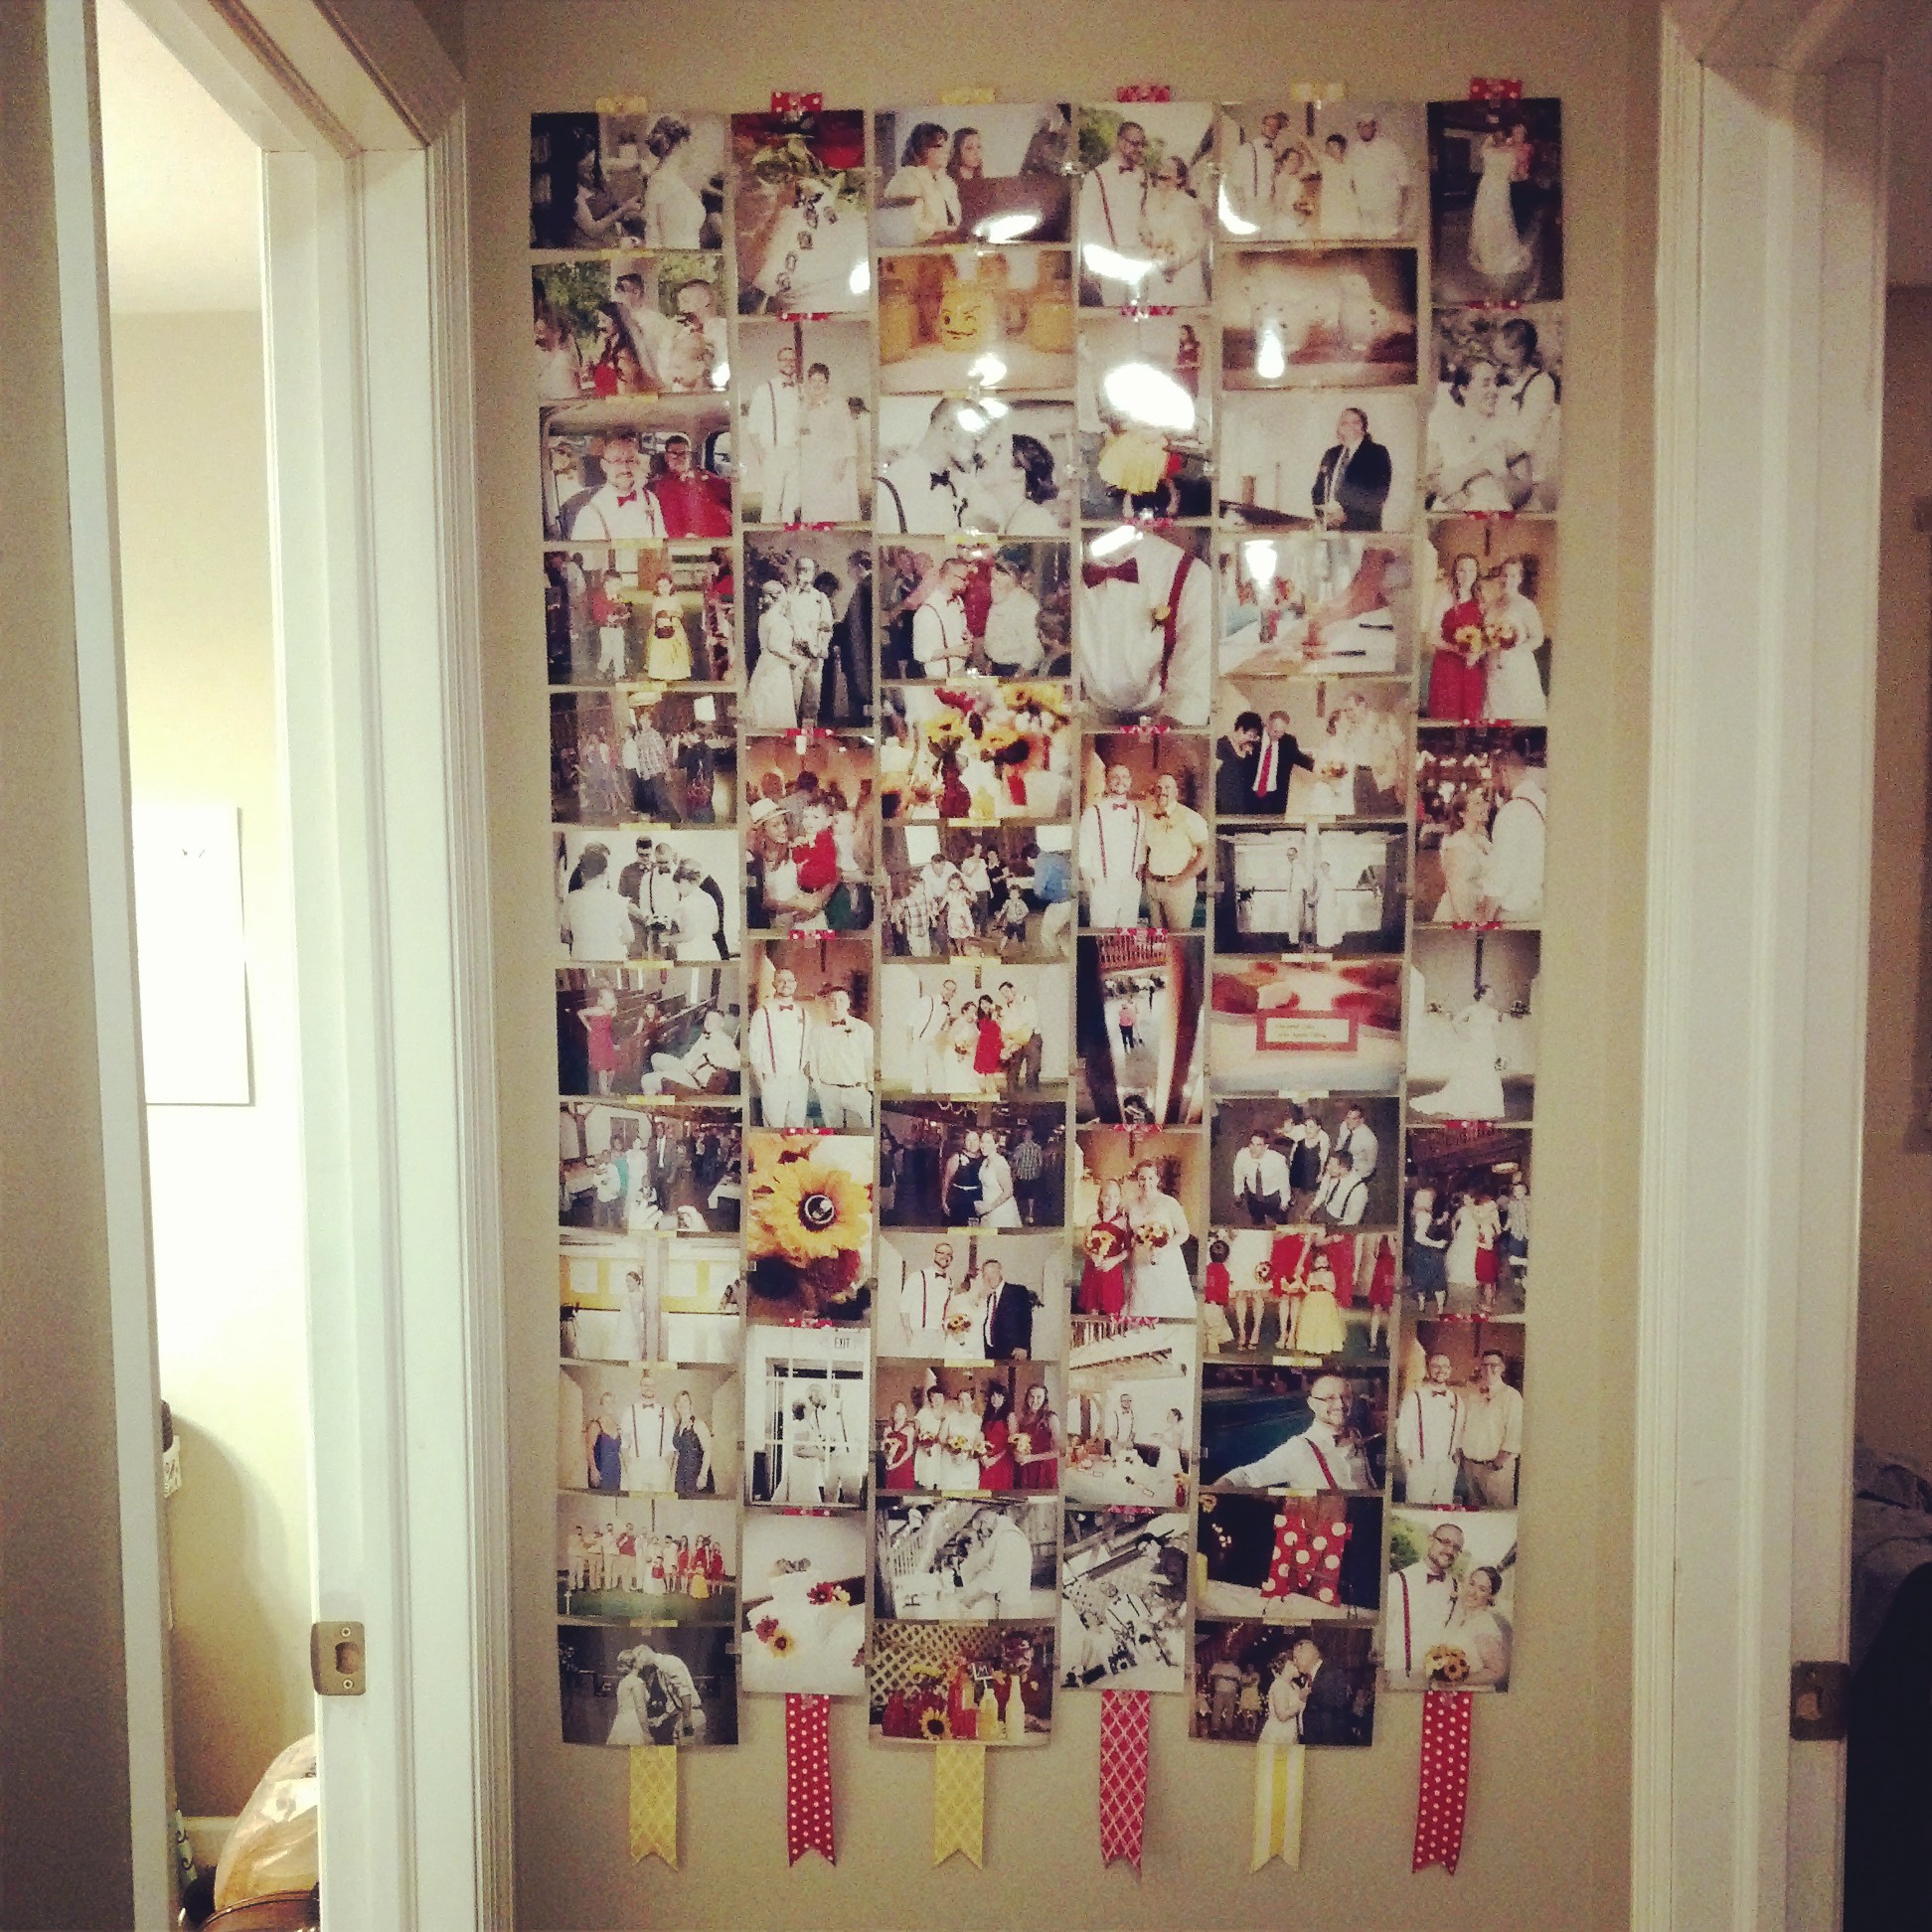
I like the alternating columns of horizontal and vertical, but it proved difficult when I decided to hang them. I wanted the whole collage to be centered on the wall, but then the divide between the left three columns and the right three columns was not the center of the photos. There was much more measuring, and mathing, and leveling, until I finally got the columns where I wanted them. I drove a nail through one of end of the ribbon and then began to add the photos. I decided that I would use the ribbon as the anchor and every second or third clip, I stitched the ribbon through the hole of the clip to keep it from sliding down or getting too heavy.
I left the ribbons hanging until I decided just how long I wanted the collage to hang. At this point, the columns are hanging by themselves, stitched to their ribbons, but not connected to each other. The clips work great vertically as well as horizontally, and with the extra support of the ribbons, I didn’t have to clip each and every photo to the others. Once it got to a manageable height, I cut the ends of the ribbons and began connecting the columns to each other. They were a tinge off kilter, but I was able to press them down in spots and get them to hang freely close to the wall.
I love the colors and that all the photos are such fun shots. We had a blast at our wedding and I wanted the collage to reflect that and remind us every day as we leave and enter our bedroom that we were made to encourage and live joyful lives. A joyful marriage is something that is so tangible and easily felt by others, and joy is contagious. I think that’s why it’s my favorite Fruit of the Spirit.
By the way, today, Matt and I arranged some stuff for the primary wall in the living room. I’m really pleased with how it turned out.
Don’t mind the obnoxious sun glare…or the blurriness of the following photos. Evidently my photo editing abilities went on vacation today.
I got an idea to turn a basket onto the wall and hang some photos inside it. The basket is a little deeper than I probably would prefer, but I still like how it looks.
I strung some twine through the basket and the attached some Lomo Fotoclips to the horizontal lines. Then, I clipped three photos that show off our whole family: My mom and sisters on the top, Matt’s side in the middle, and my dad and fam on the bottom (with the mustaches…of course). I did add a sunflower for an accent because it just wouldn’t be something of mine without a sunflower.
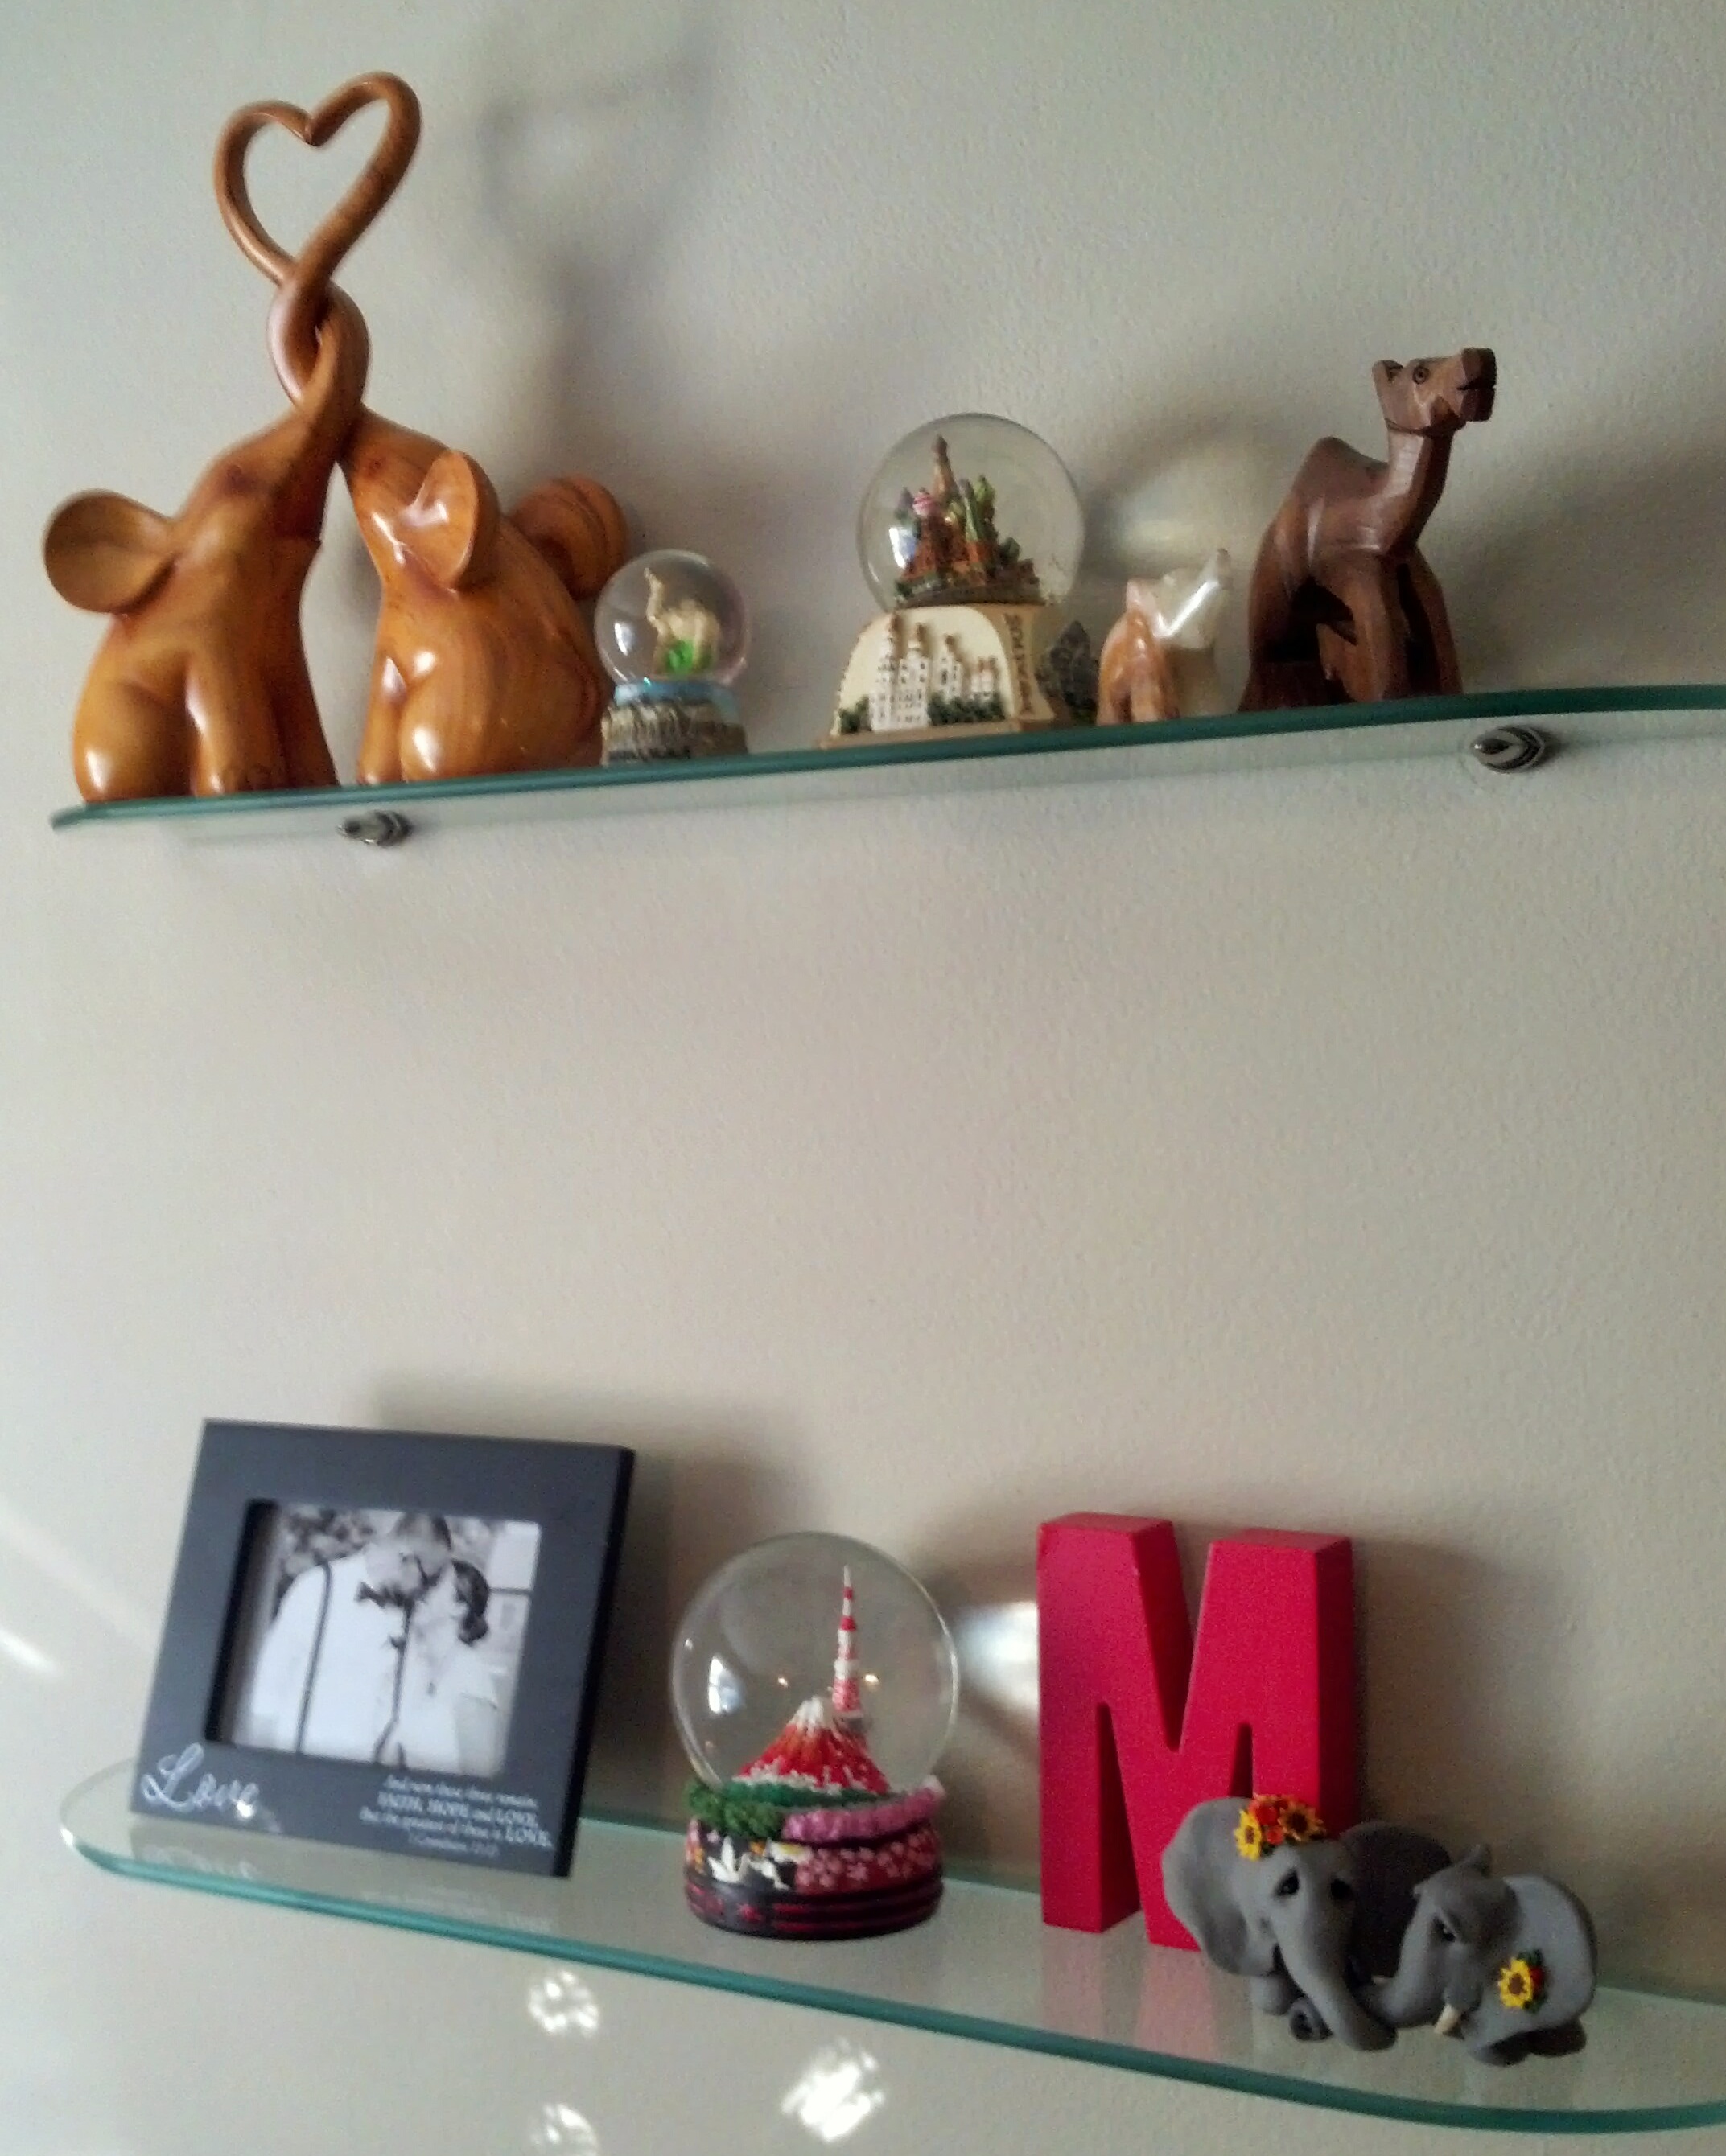
The map was a gift from my mom when I got home from Japan. I love it. There are pins to tack where I’ve been, where I want to go, and where I’m going next. I don’t have anything in the “next” part, but I have pins all over the map. The plate label says, “XAPA to the world” which is the Greek work for “joy.” It’s pronounced “chara”, by the way, like car-uh.
The shelves are from Ikea, but the knickknacks are from all over. Let’s see, elephants with heart were from my dad and step-mom. I bought the small snow-globe from the airport in Dubai, the next one was from the airport in Moscow, and then an alabaster elephant from Cairo, and I believe the camel came from Israel. On the second shelf is a frame from my aunt, a snowglobe from Tokyo, a big letter M from Michael’s, and the elephants from on top of our wedding cake.
I love traveling and I miss it a lot, but I am loving my new life. These shelves show how I am bringing those two parts of my life together. The paintings on the left were done by me at a paint studio called Paint by the Glass. I’ve done a review on them before. They are so much fun. I did these all over the course of three years, perhaps, and somehow they all ended up looking very similar and matchy, so we put them up together.
I am not done, by any means. There’s a little bit of a wall between this one and the front window where I want these pictures to go:
.
I feel like it’s starting to all come together and I’m very excited for it. Yay for new homes!
I promised that I would put up reviews of the vendors I used for the smaller details of the wedding. I’m going to start with the ceremony first and then move on to the reception. First, I would like to say that most of these photos were taken by Sadie Hodge of Sadie and Jess Weddings. I did a pre-review for her here and you can find their Facebook page here.I’m going to include things that I bought as well as things that I made and was inspired by something on Pinterest, online, etc. I will try my best to site the resources for you. And here we go!
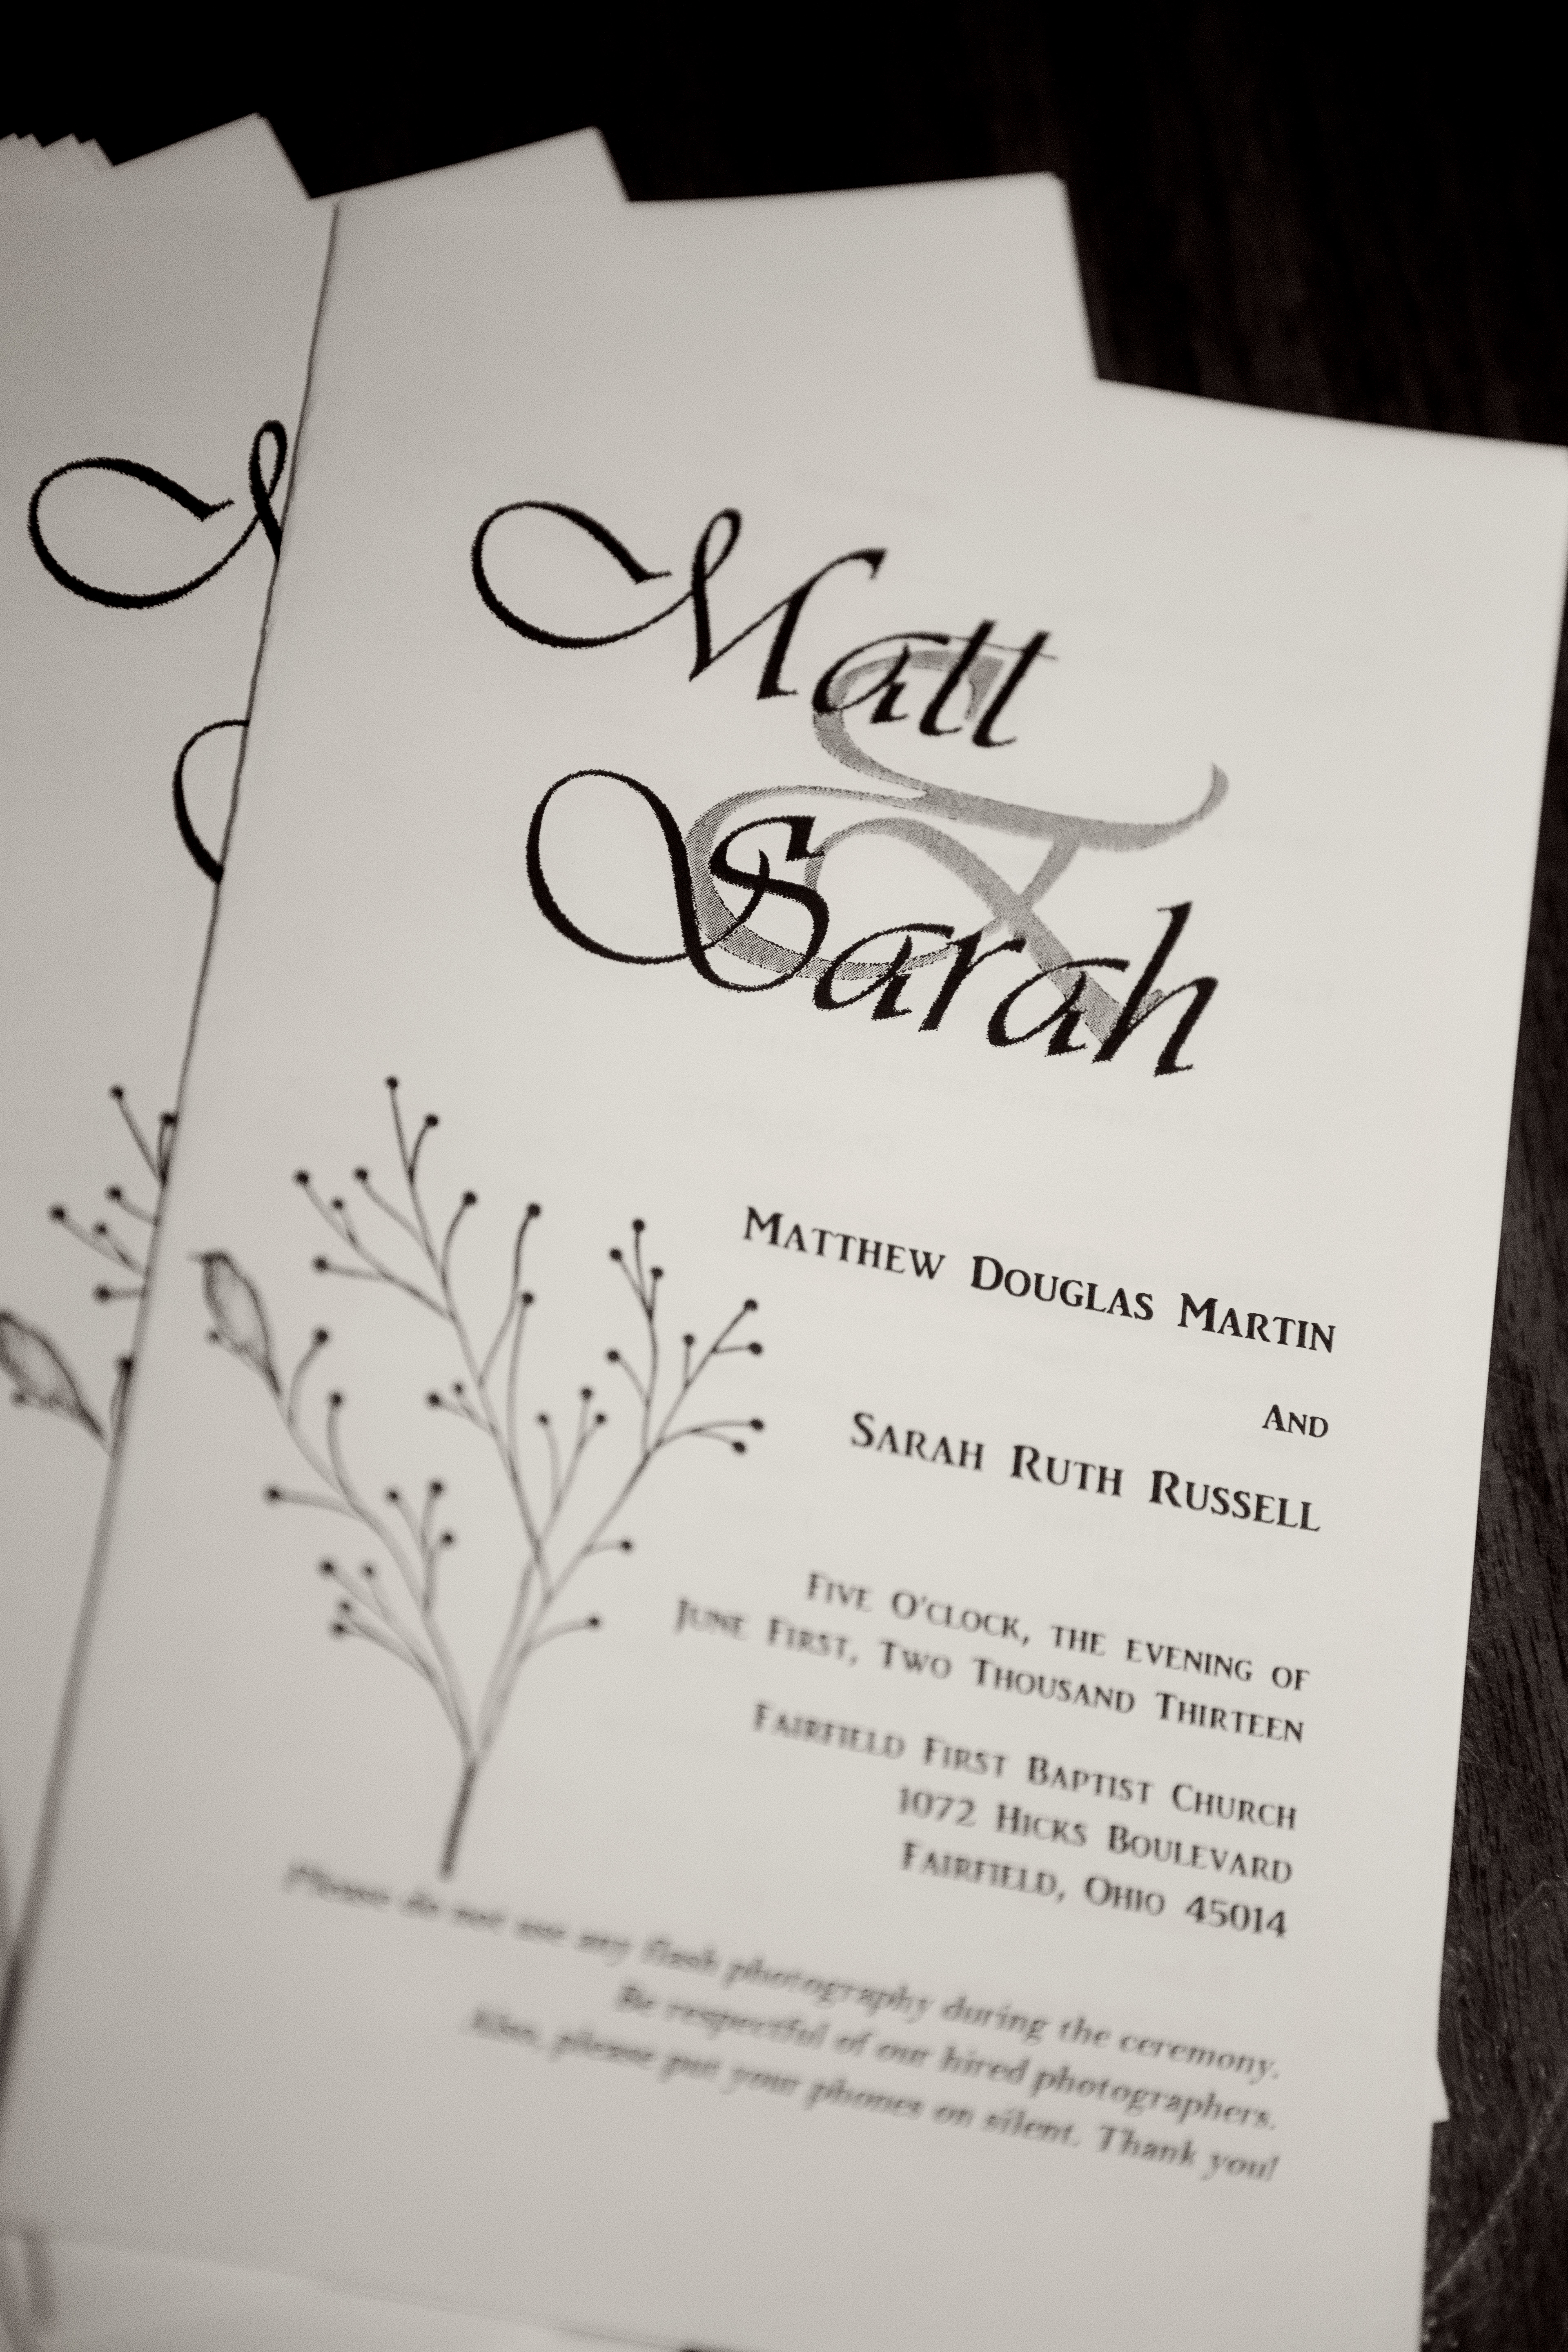
Program
I went simple with the programs. We printed them out ourselves and I designed the whole layout. The top image is something I designed and made into a stamp that we used on our invitations. (Post 1, Post 2 and Post 3) The bird in a tree stamp came from Hobby Lobby. I only stamped one program and then made copies of it. Yes, it was the easy way out, but I was still putting these together the week before the wedding, so I was loving “Easy.”
At the bottom, there is some text that I think was very helpful. It says, “Please do not use any flash photography during the ceremony. Be respectful of our hired photographers. Also, please put your phones on silent. Thank you!” We commissioned everyone at the rehearsal to mention it to guests. I had originally planned to have some sort of verbiage like this, but that was only strengthened after reading this.
The order of participants we chose was: Officiants, Parents of the Bride, Step-Mother of the Bride, Parents of the Groom, Grandparents, Bridesmaids, and Groomsmen. We listed our grandparents together with their spouses and any that had passed away, we put an asterisks after their name and a note “(* in loving memory).”
We worked out the order of the ceremony with my pastor and included instructions for communion. We (Matt and I) love communion and since we are coming from two different churches, not to mention the many churches represented by other friends and family, communion is a great way to draw unity with a diverse group of people. Different churches have different traditions in the act of communion, so we had to make sure everyone was on the same page. It worked out wonderfully!
We also invited the guests to sing along with our singers while people were walking down the aisle. The back page of the program shared the lyrics of the primary songs so people could join in. It was a lot of fun to walk down the aisle to people singing along one of my favorite songs, “For the Beauty of the Earth.” Ever since I heard it at Meg’s wedding in Little Women, I have wanted it in my wedding. We also had “Greatest Commands” which is a great acappella song that Matt’s church sings, “Blessed Assurance,” and “Blest Be the Tie That Binds.”
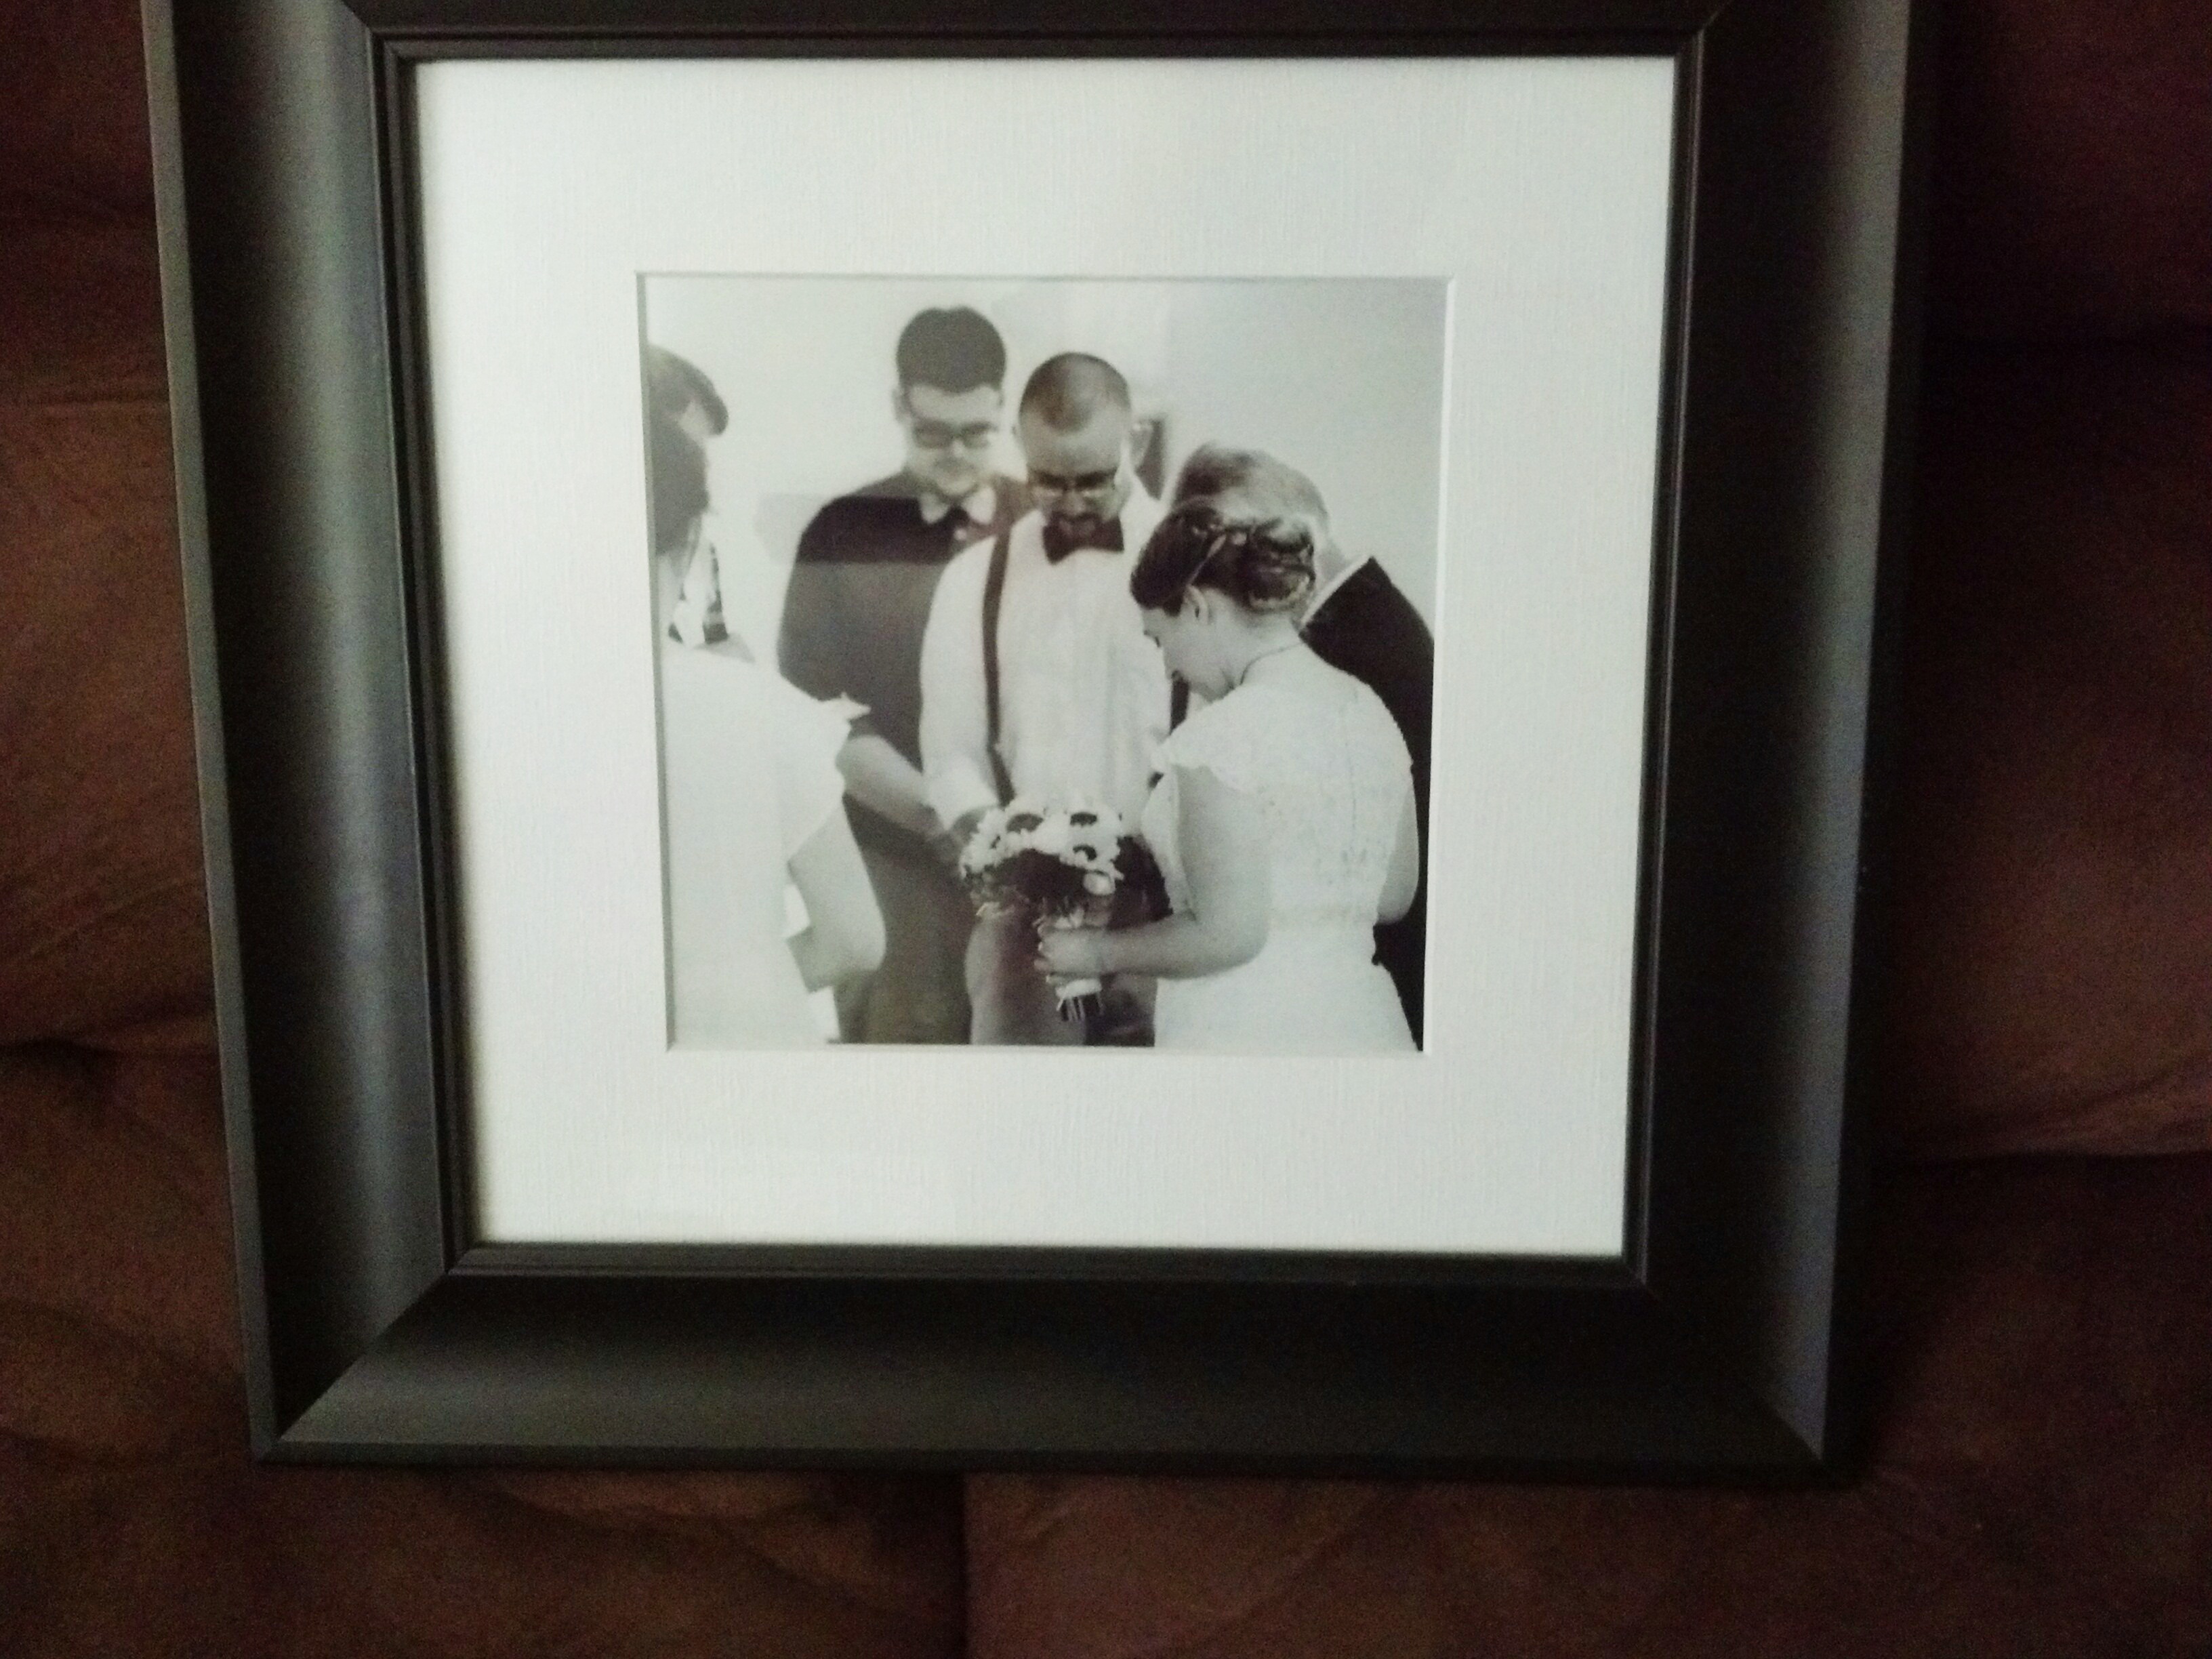
Rings and Bibles
Matt and I have great love for our families. We both have lost two grandparents each, one from each side in the last 4 years. We wanted to include those who couldn’t be there as much as possible. We know they’re in heaven, and would’ve been so glad to be here for our wedding, but God decided to take them on home. What you see here is my Pappy Cook’s Bible and Matt’s Grandpa Charles’ Bible. It was inspired by this pin. My grandma decided to give Pappy’s Bible to my nephew, Jason, who was a junior groomsman in the wedding. It has his notes and everything and I heard that Jason just loves it. Pappy is touching our lives and discipling us even after he has left earth. What a testimony that man has.
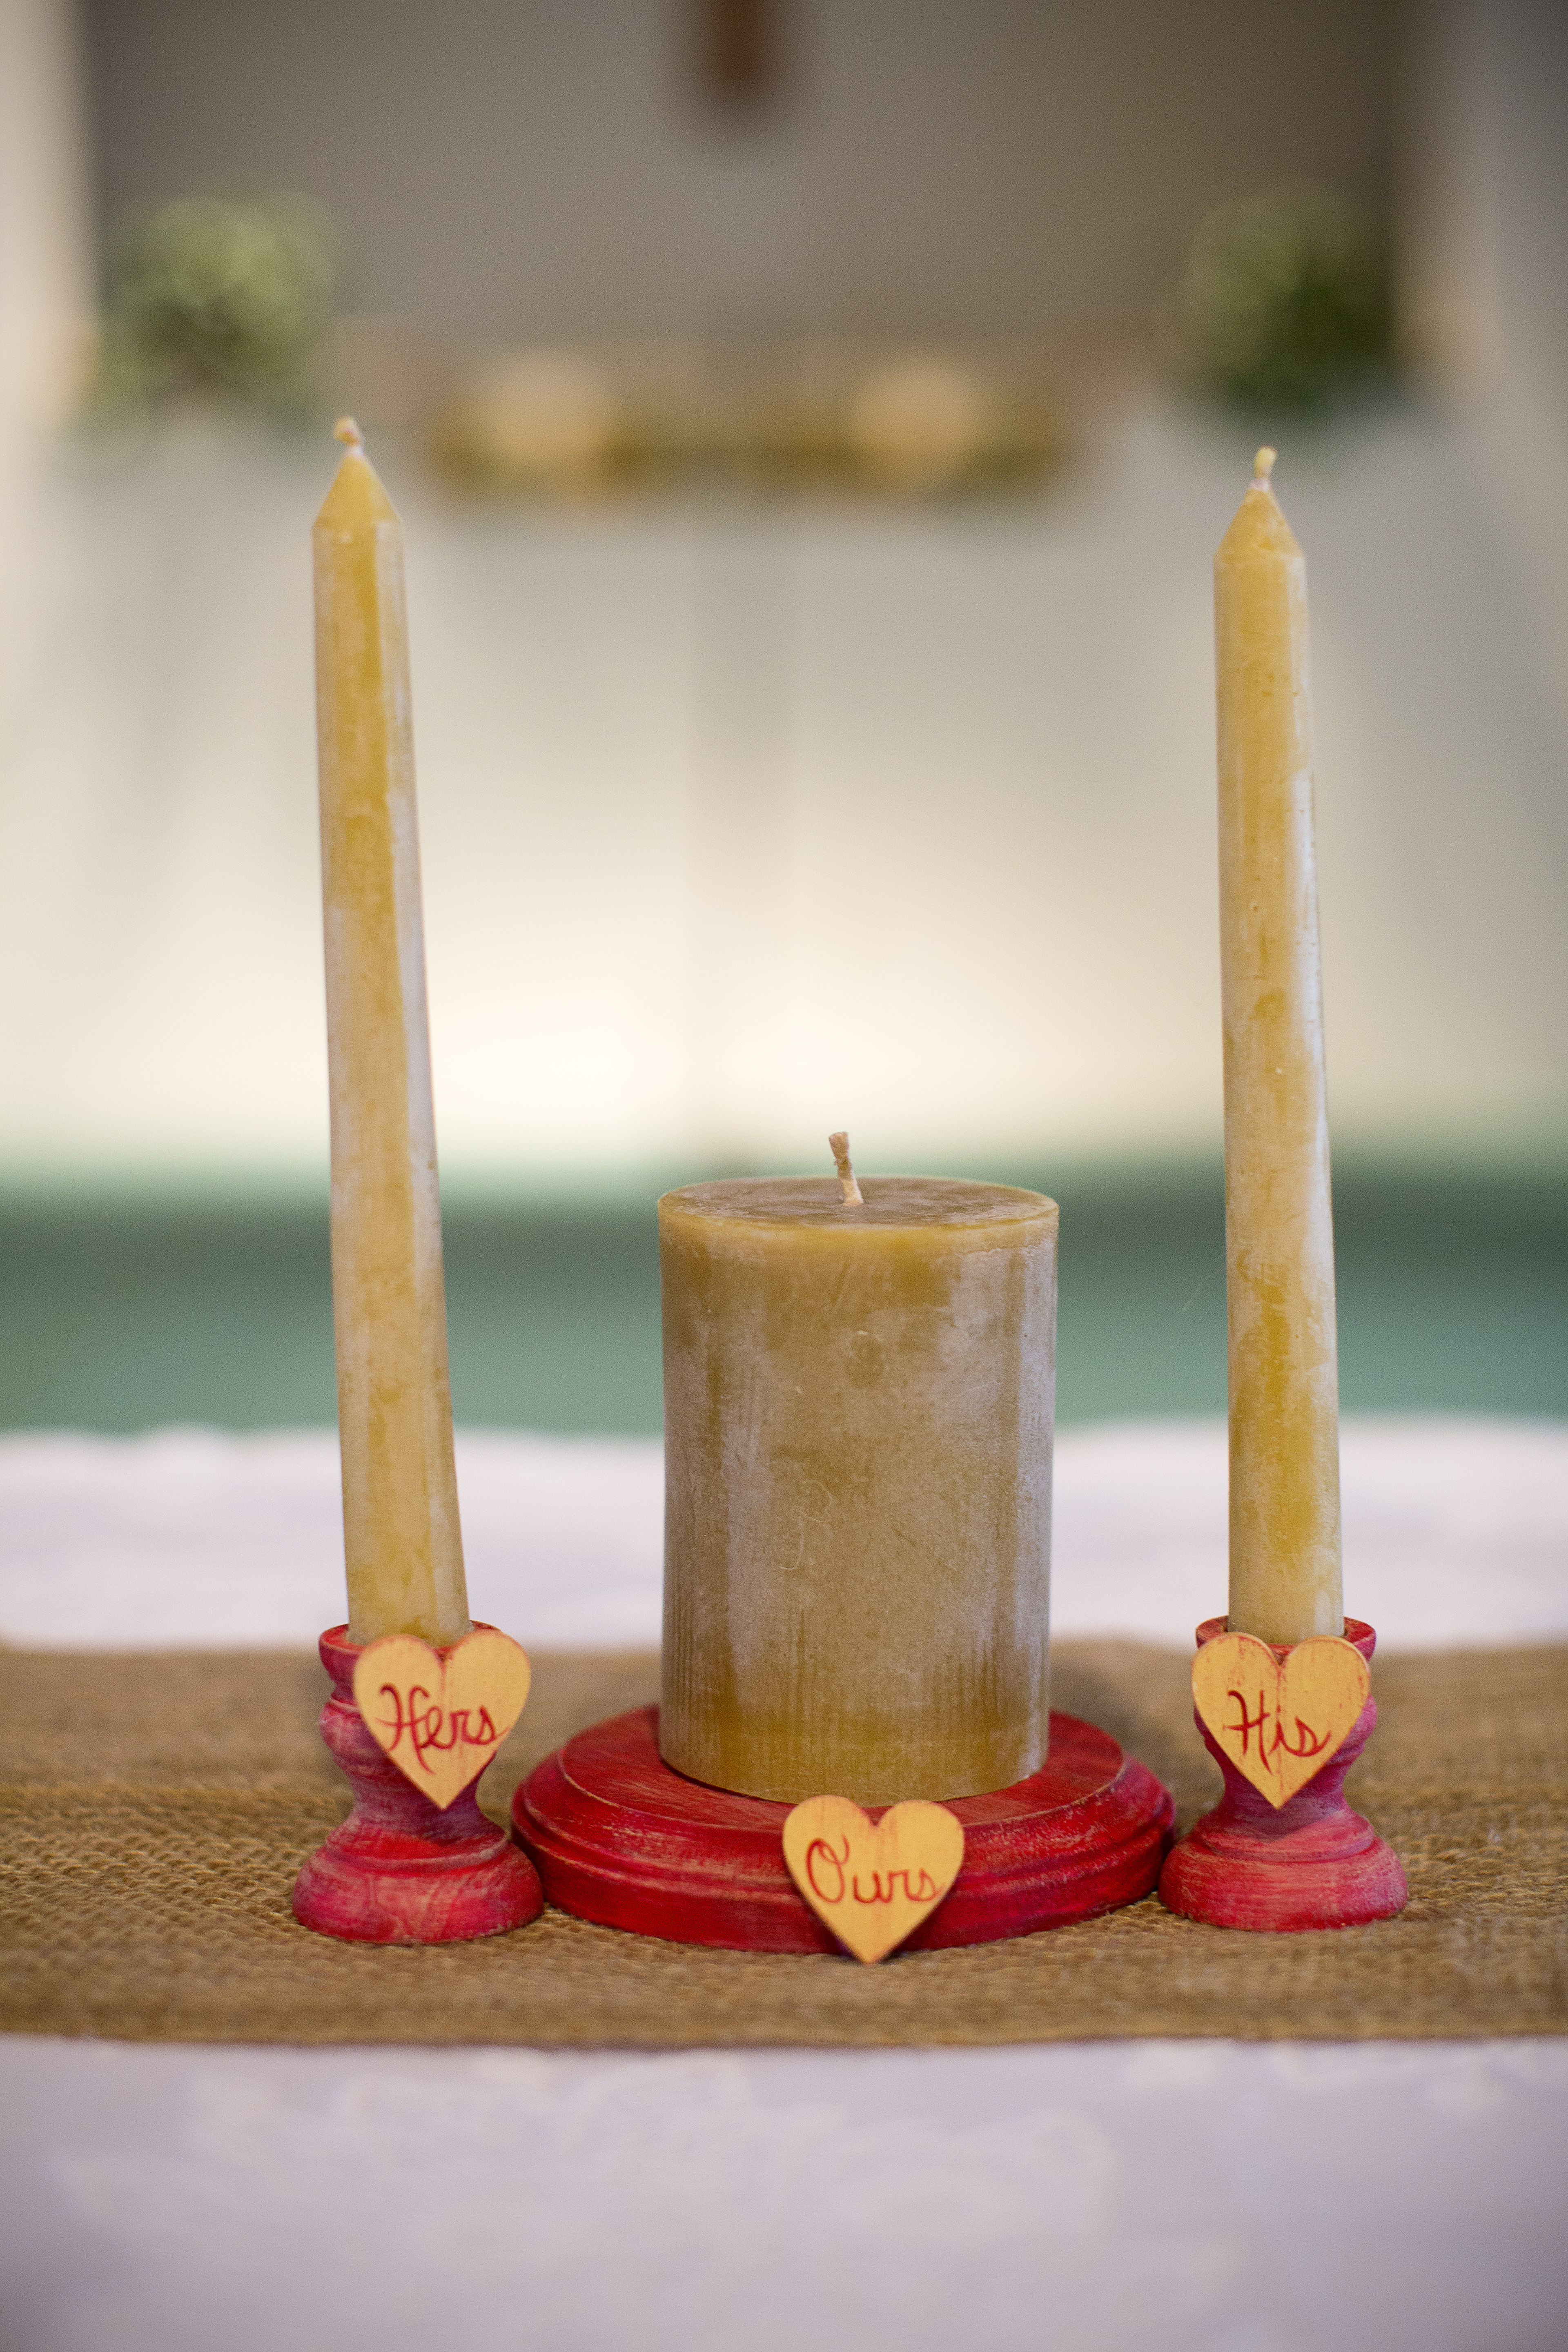
Unity Candles
This is a two part mention. The candles came from The Oliver Company on Etsy. They have all sorts of home sweet goodness, beeswax coming straight from their own hives. I just checked the shop and didn’t see the unity candles on there, but I’m sure they will be back. In the meantime, check out the other great products they have from lip balm and honey soaps to burlap flowers and bows.
The stands came from Morgan Hill Designs. I was looking for something unique and something that could be customized to our wedding colors. Totally found it with this purchase. I loved the “His” “Hers” and “Ours” labels. I haven’t found a place for the His and Hers yet, but the Ours with the pillar candle is displayed with some other things from the wedding in our living room. It is perfect. There is a guide for paint colors on the shop and you just have to designate what it is you would like. I just took another stroll through her shop and there are 75 pages worth of items! all hand-carved and painted. So many unique finds and completely personalized. Be aware that there is a bit of a turn-around time. She is up-front with the prep time so be sure to read the fine print so you’re not disappointed or act too late.
Groomwear
We got most of Matt’s outfit from JC Penney. My original thought was that he would be in all red with the khaki’s, but he wanted to make sure he stood out from the groomsmen, who would also be wearing red and yellow. He chose a white shirt and we managed to find a red bow tie at the store. However, the red suspenders proved a little more difficult than we anticipated. I thought that with the hipster culture going on right now, suspenders would be super-easy to find. No go. I looked everywhere and it just wasn’t happening.
Naturally, I redirected to Etsy. Dapper Gent is THE place to go when you are looking for suspenders, bow ties, or matching sets. I found what I was looking for quickly and received our order in record time. It was good, we were running close on time. The cost was a little more than I was anticipating, but at that point I was willing to pay a little more to get what we (ok, I) wanted. They have so many cute sets for kids. Absolutely precious if you have a boy and he’s cool with stepping up his style.
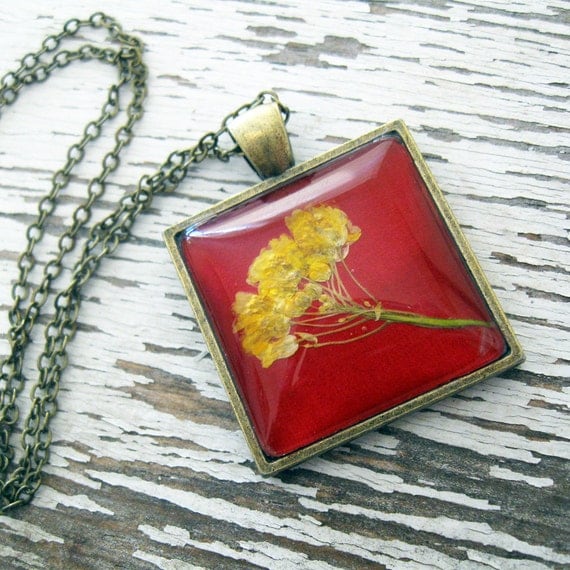
Jewelry – Bride
Picture taken from Etsy.com
I chose to go minimal. My dress was so detailed and beautiful that I didn’t want too much else taking away from it. My makeup was minimal and done by my MOH. The hair complemented the dress (wish I had a good picture of my hair, but I don’t) but I still wanted a pop of color and a way to tie myself into the wedding besides my flowers. This necklace was just the ticket. It matched the dress perfectly and combined the wedding colors in a way that I swooned for. I bought it from Winter Garden Studios on Etsy. I had originally wanted to find a jeweler in my own area, but this was far and beyond what I could’ve wanted. Here’s the best picture I could find of me wearing it.
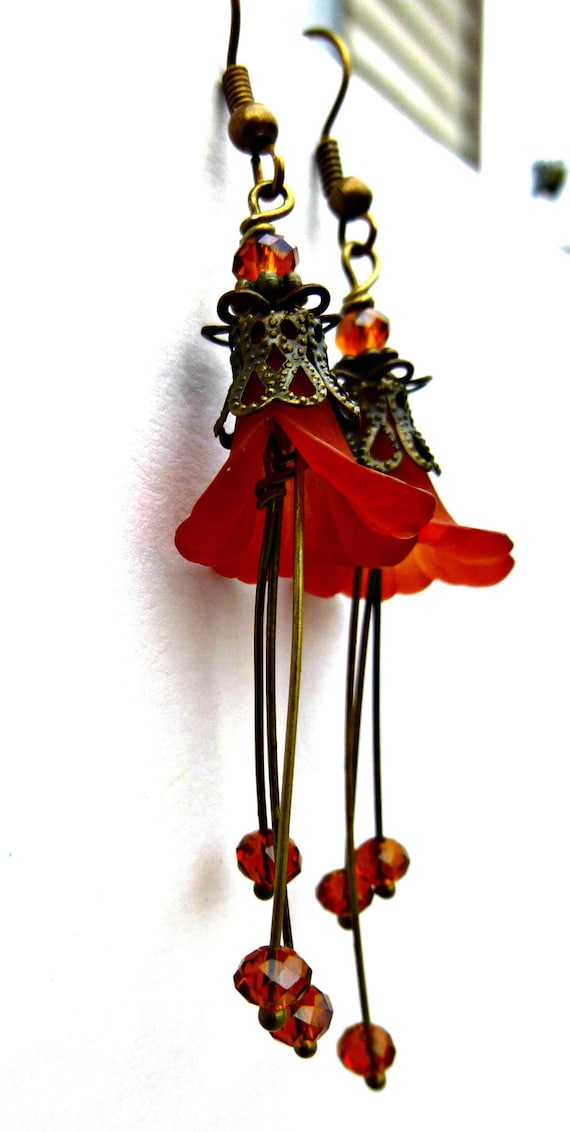
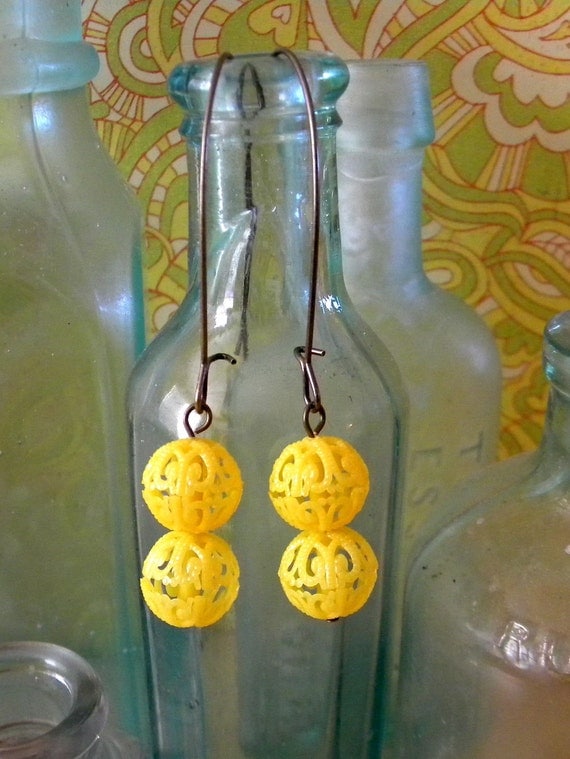
Jewelry – MOH and Bridesmaids
Picture taken from Etsy.com These earrings were for my Matron of Honor. I fell in love with these when I saw them. If I could wear earrings, I probably would’ve got them for myself. I bought them from McKee Jewelry Designs on Etsy, which I would link for you, but Etsy says she no longer exists. That’s sad. Lanna (MOH) was wearing yellow for the wedding, so her accents were all in red.Picture taken from Etsy.com For Amy, my bridesmatron, dear friend. Her dress was red so her accents and flowers were more yellow. Yellow is our collective favorite color, so it worked out perfectly. I discovered IKE and Co through the Craft Weekend blog and fell in love with these earrings. They are perfect for Amy. Ike is the name of their dog, by the way. IkeandCo is on Instagram too and she puts up some great stuff. 🙂Picture taken from Etsy.com These earrings were for my two nieces who were the junior bridesmaids of the wedding. They were wearing red dresses so their accents and flowers were mostly yellow like Amy’s. JoMazing Accessories has quite a bit in their shop so I recommend stopping over for a visit. She’s currently on vacation, so give it about 3 weeks.
More on the Wedding
You can find more about the wedding by checking out the Countdown Post. I posted each week leading up to the wedding and detailed a lot of the preparations for the big day. Soon to come, Wedding Details – Reception.
Well, we decided to go see Star Trek last Saturday for my birthday. Rather, I decided and Matt said, “Sure…it’s your birthday!” But he laughed during all the appropriate parts…sometimes during inappropriate parts too. Like, when one character is dying, and there is intense grieving on-screen, he turned to me and said, “Spock says, ‘Whaaaa??’” I did tell him that Vulcan’s don’t have much emotional expression, but I neglected to tell him how Spock is part human and therefore, capable of expressing emotions. Moot point. I shrugged it off and went back to my tears.
We stopped at Red Robin for dinner. My first time. *First times!* I got the Chili Chili Cheeseburger. Can you say yum?
All that was left. It was so tempting that I forgot to take a before photo.
We got a box of gift cards to restaurants and such at one of the wedding showers, so my birthday date night only cost us about $10 max and that was leftover cost of meal and tip. Very nice afternoon/evening.
I’ve been trying to make this place more homey and together. It’s been hard because there are still boxes about that need to be unpacked. I can’t do that until I paint the bookshelves and start getting things on the walls. It’s a mess.
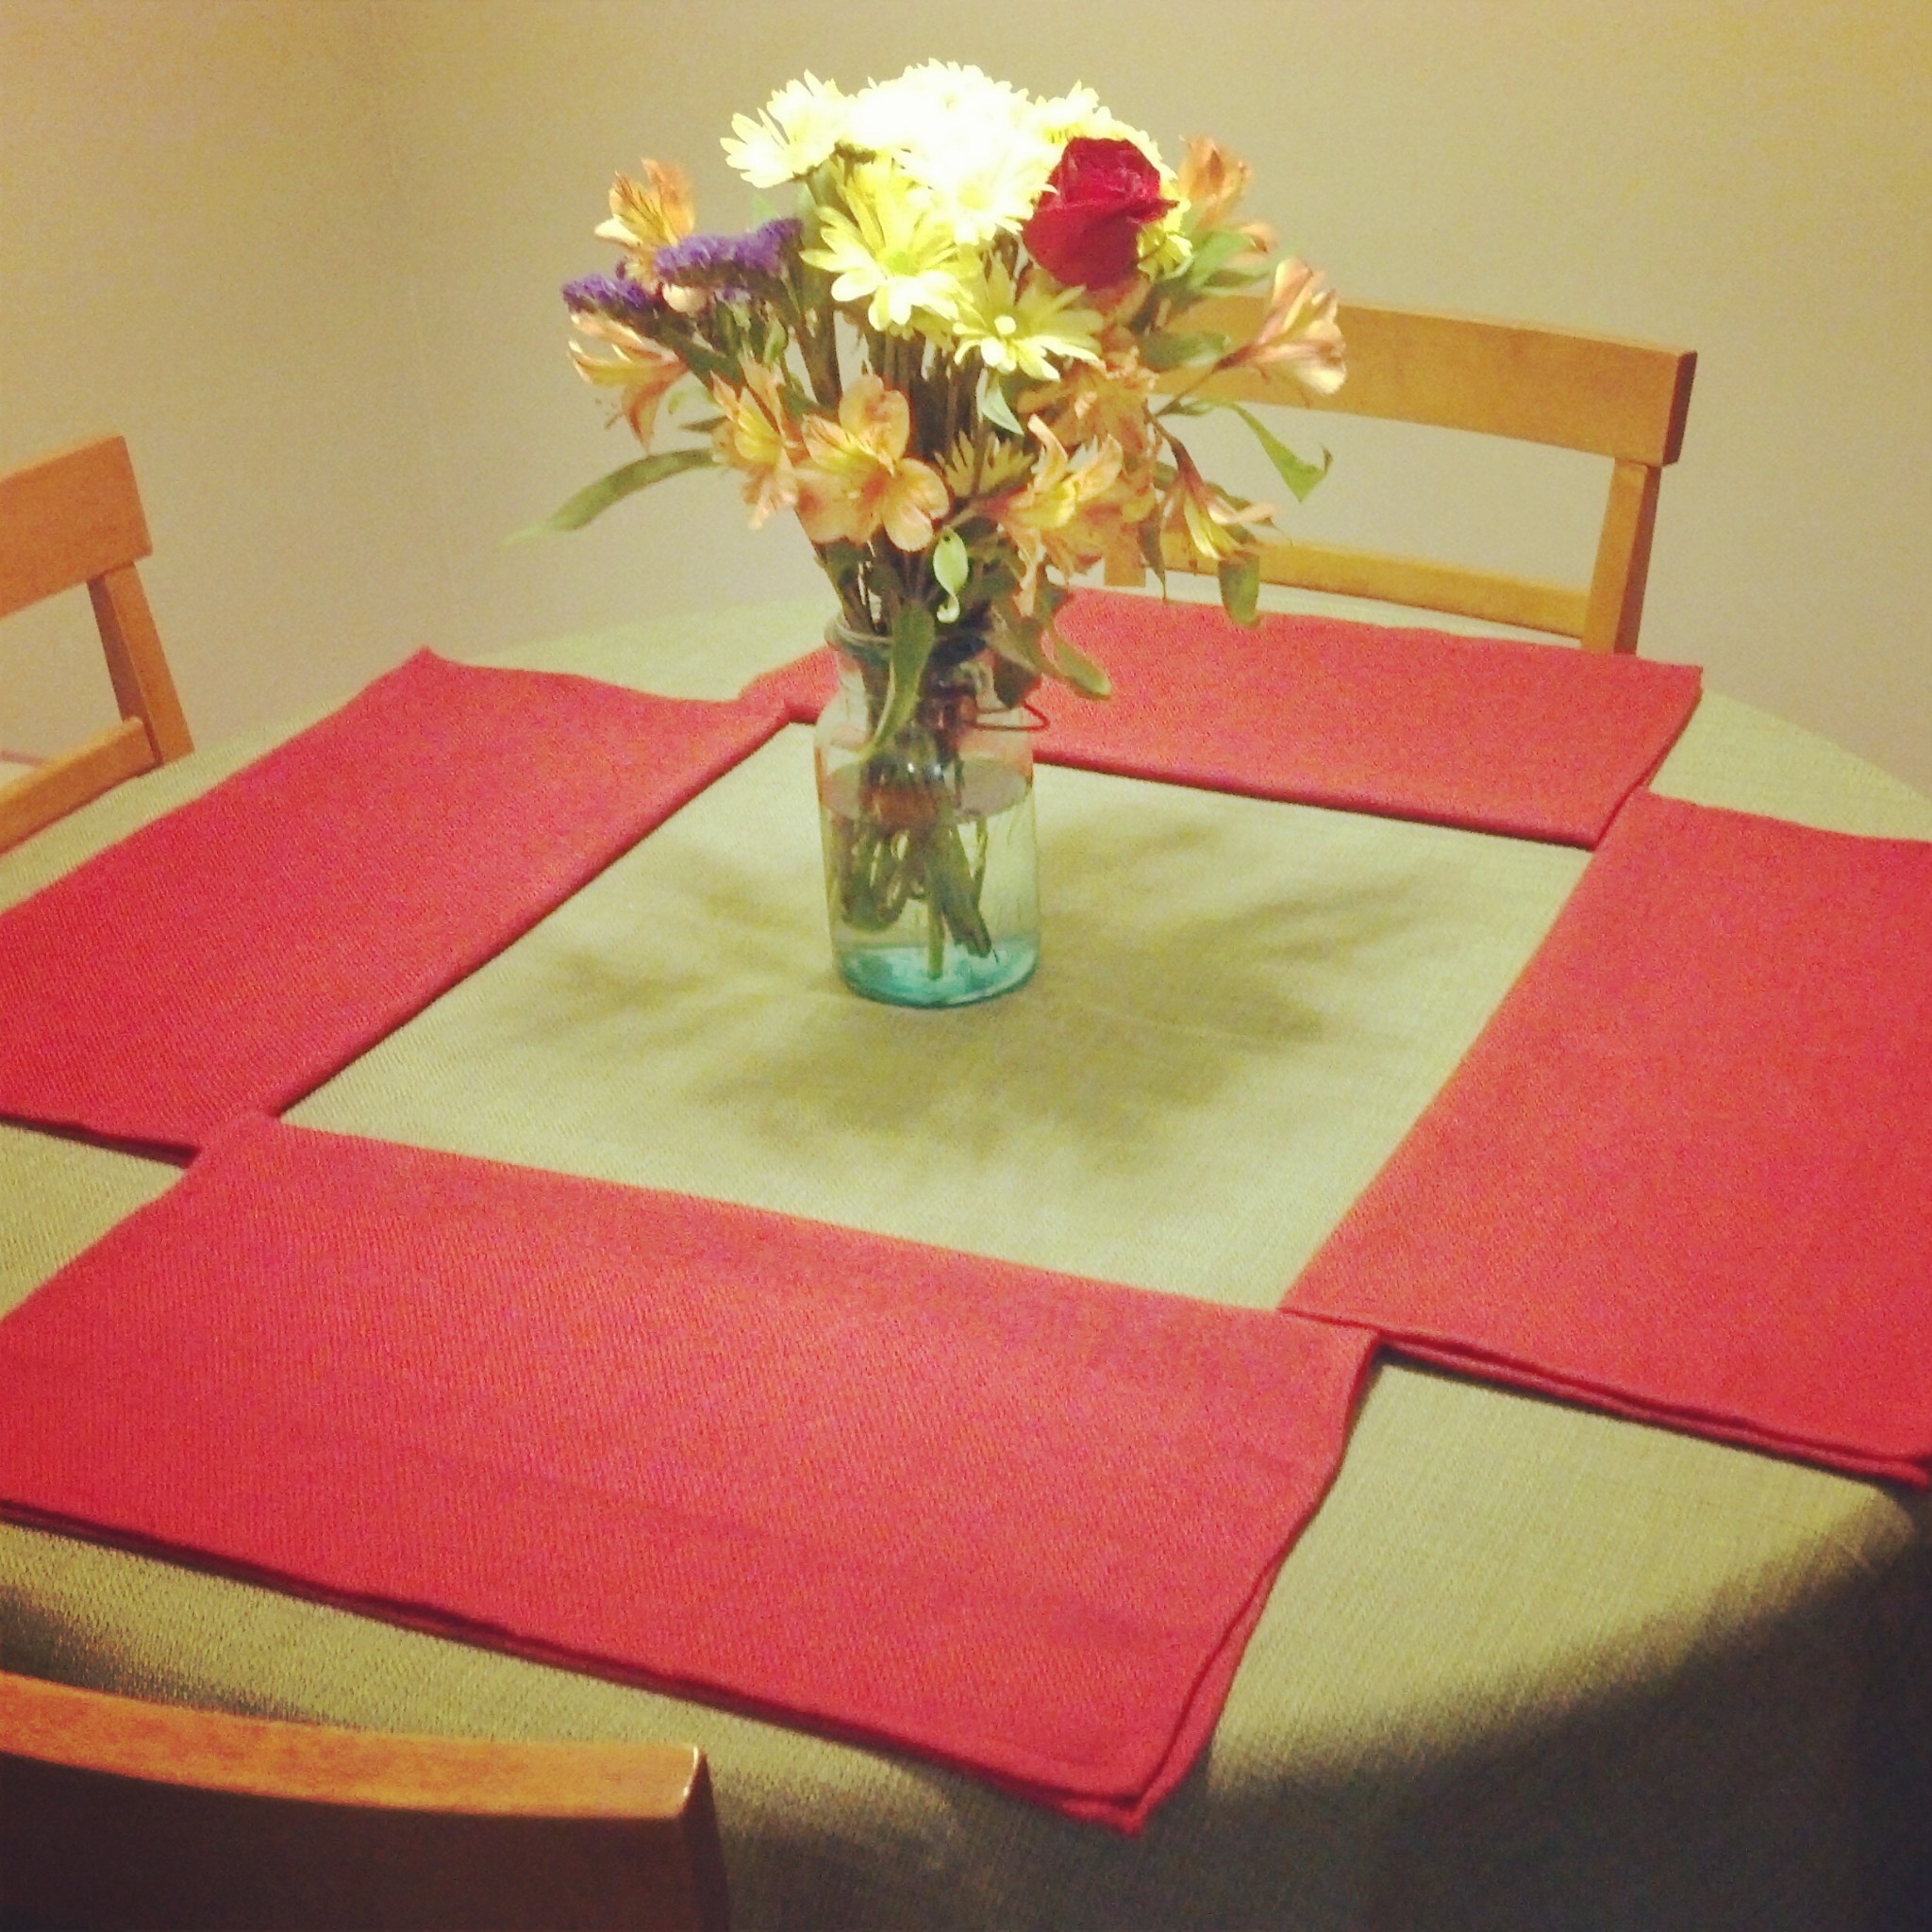
But I did manage to pull out the tablecloth and napkins and iron them out. I’m just saying, tablecloths are my least favorite thing to iron.
Sure looks pretty, but I’m still not sold that it was worth the effort. Not to mention, it’s a round tablecloth! Ugh. Anyway, those are the flowers from the Huz. We’ve actually had two meals at the table now, since I put it together. That’s nice.
I’ve even been cooking. I had bought some various kinds of meat and thrown them in the freezer until we got around to doing something with them. I’ve been eyeing the tilapia that’s been in there for a while now, but I’ve never made fish before…besides fish sticks as a kid, and I have long since thrown those out of my diet. So, I went to good old Allrecipes.com and searched, “Easy tilapia.” No joke.
Ok, the fish IS in there, and it tasted yummy. I forego most things with lemon, and I went ahead and increased the amount of melted butter. It was pretty wonderful. There was so much seasoning on the fish, that I didn’t put much more than salt and pepper in the mashed potatoes…which I made from scratch. Go me! 🙂 You have no idea what an accomplishment this is for someone like me. I have never felt comfortable in a kitchen unless I was baking something, and then I’m right at home. Cooking is too ambiguous for me; there just aren’t enough rules. But I think I’ll keep trying at it. Matt certainly hopes that I will.
Speaking of kitchen, I walked into mine last night and found some tiny black ants crawling on one of the counters. Just in one little spot. You could tell they were just starting to explore. Ugh. I pulled everything off that section – they weren’t in anything yet, so it was a good catch. I stopped by Home Depot after work today and picked up some bait things and some spray.
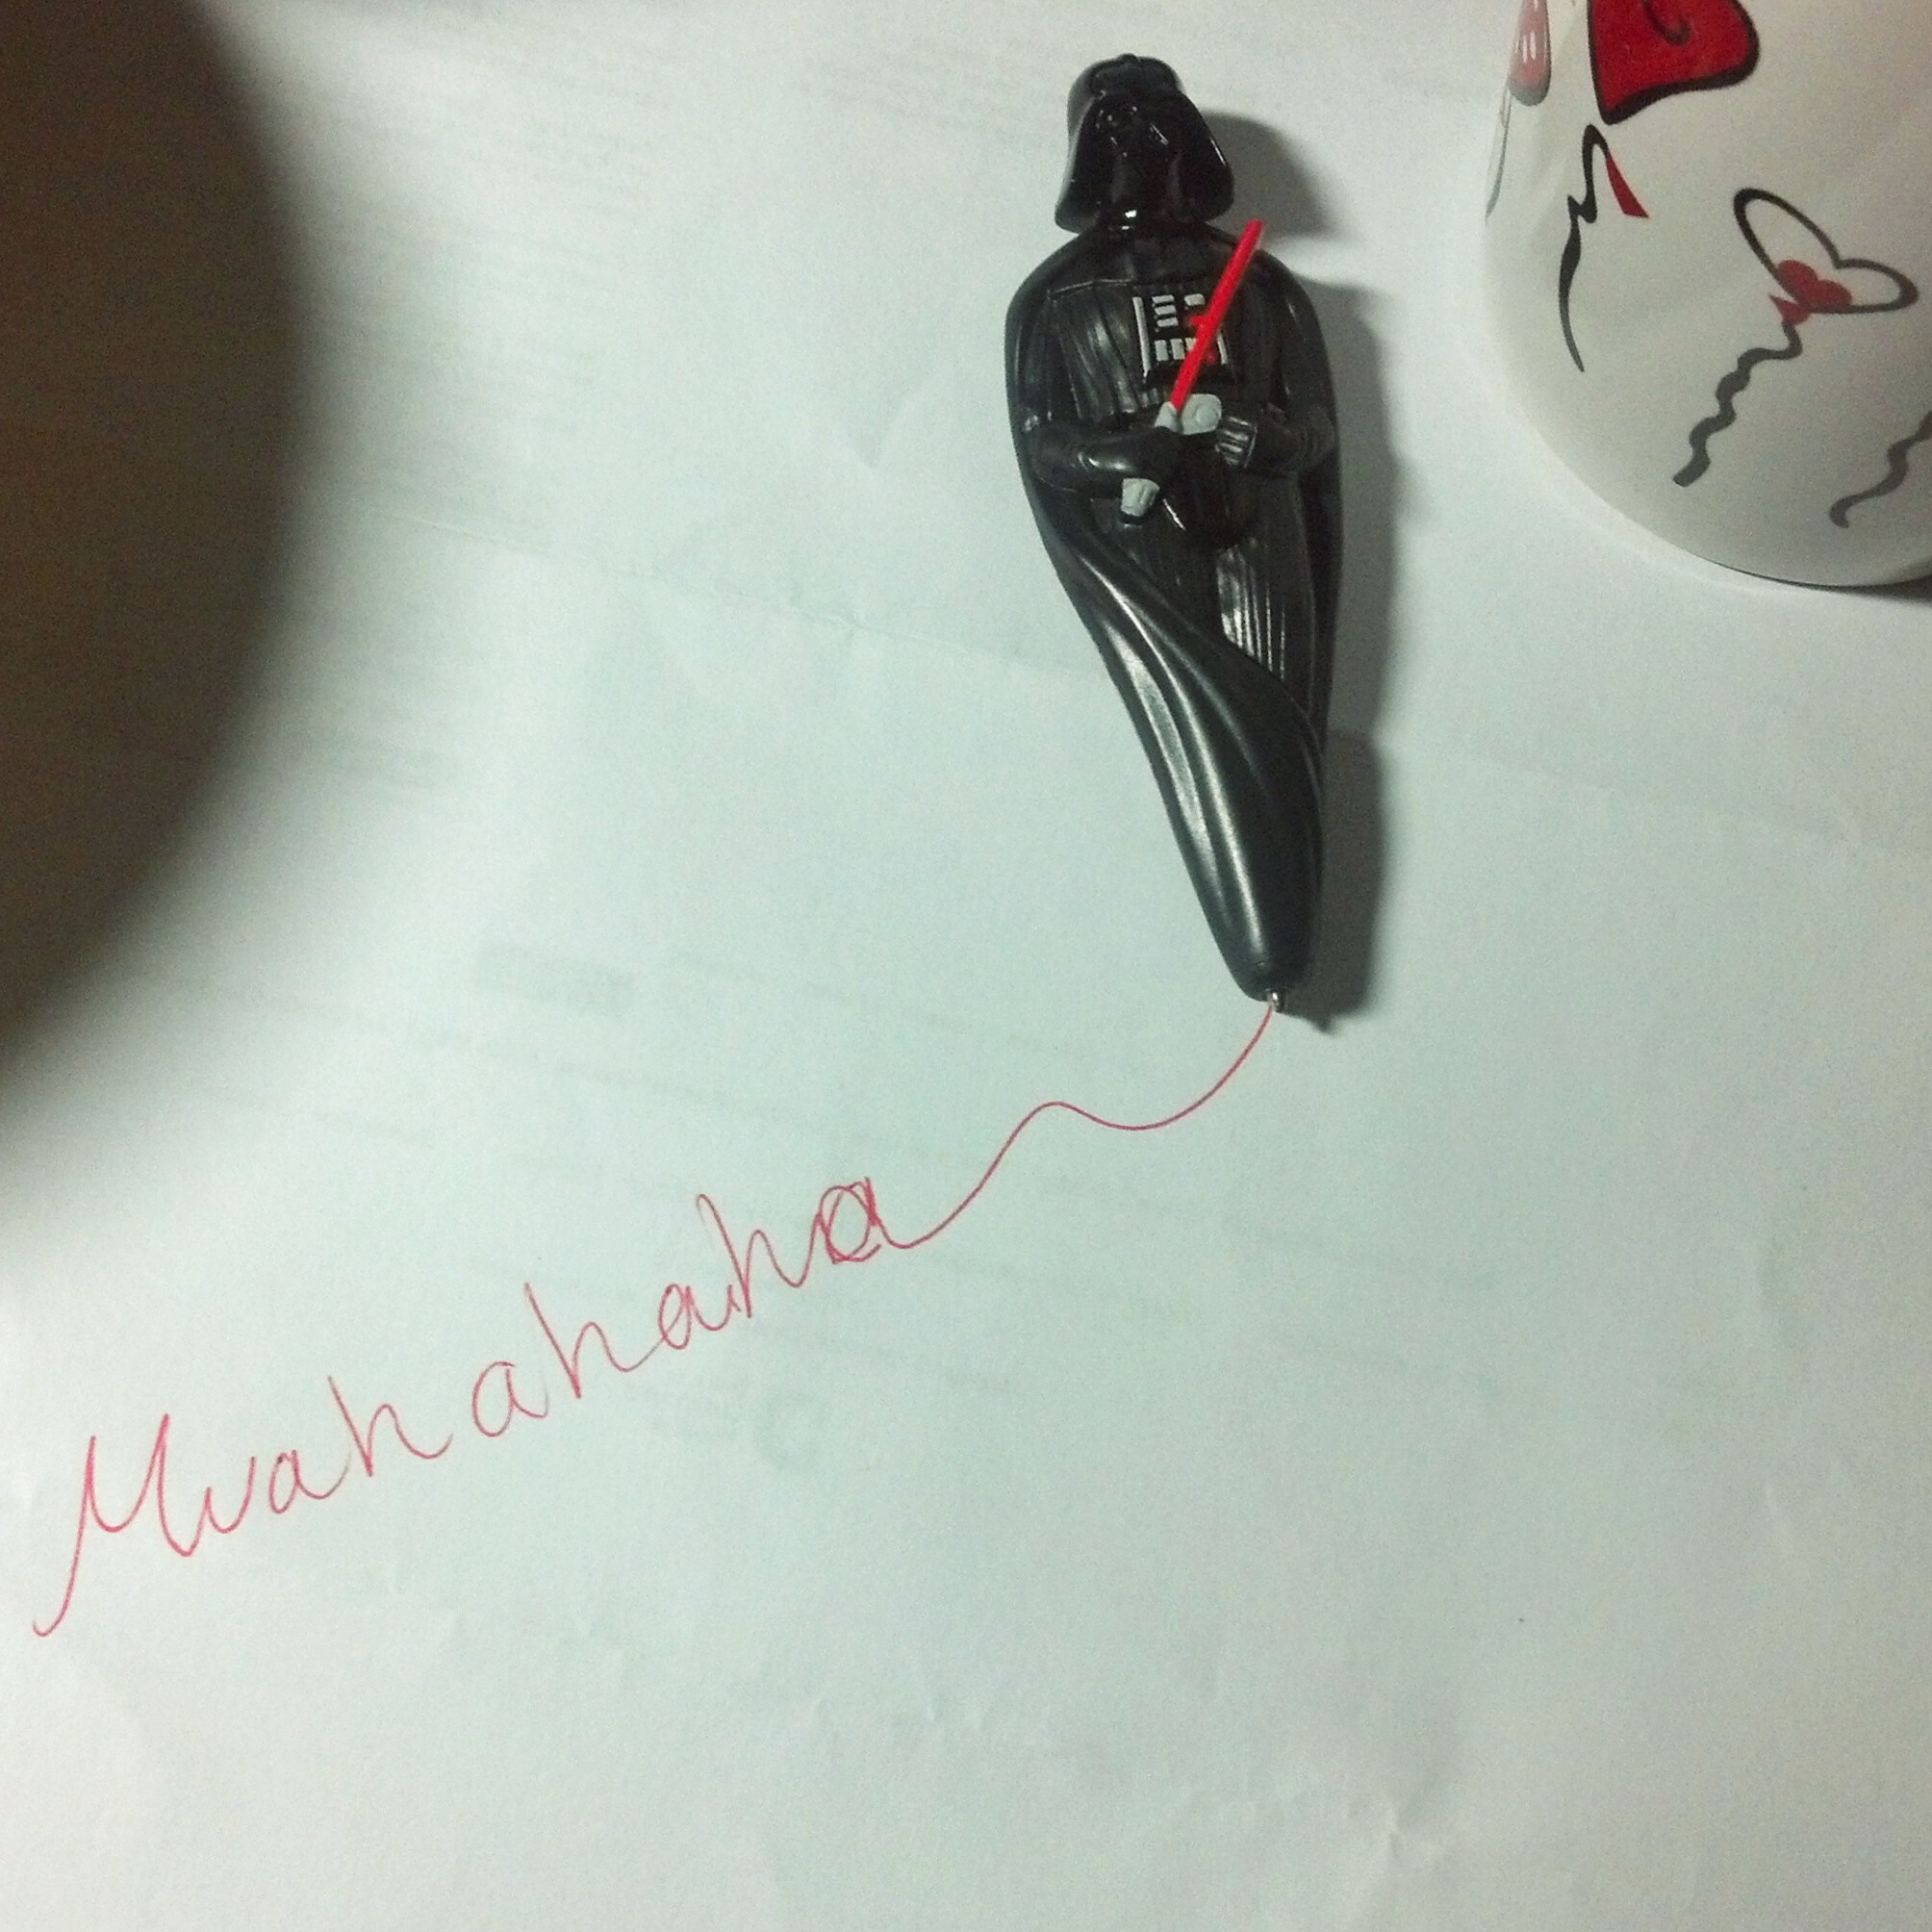
They caught on pretty quick. I went down for a nap and when I woke up 30 mins later, they were all over the trap. And then taking it home to their queen….to MURDER her! muahahaa! I let them go back and forth between the bait and their lair for a few hours and then sprayed the perimeter. The stuff must be pretty potent because there is little to no movement in that corridor now. Maybe I’ll leave the carcasses for Huz to clean up. 🙂 That sounds great!
I mentioned that I have some bookshelves to paint before I can really start putting the house together. Well, here’s one!
This used to be my dad’s…way back in his college days. I didn’t know that until a week or so ago. This isn’t its finished state. I am just getting started. But i think it’s going to be good. It’s a short one and then I have its two big brothers to paint after it. Wish me luck! I love painting. 🙂
—————–
Garden Update:
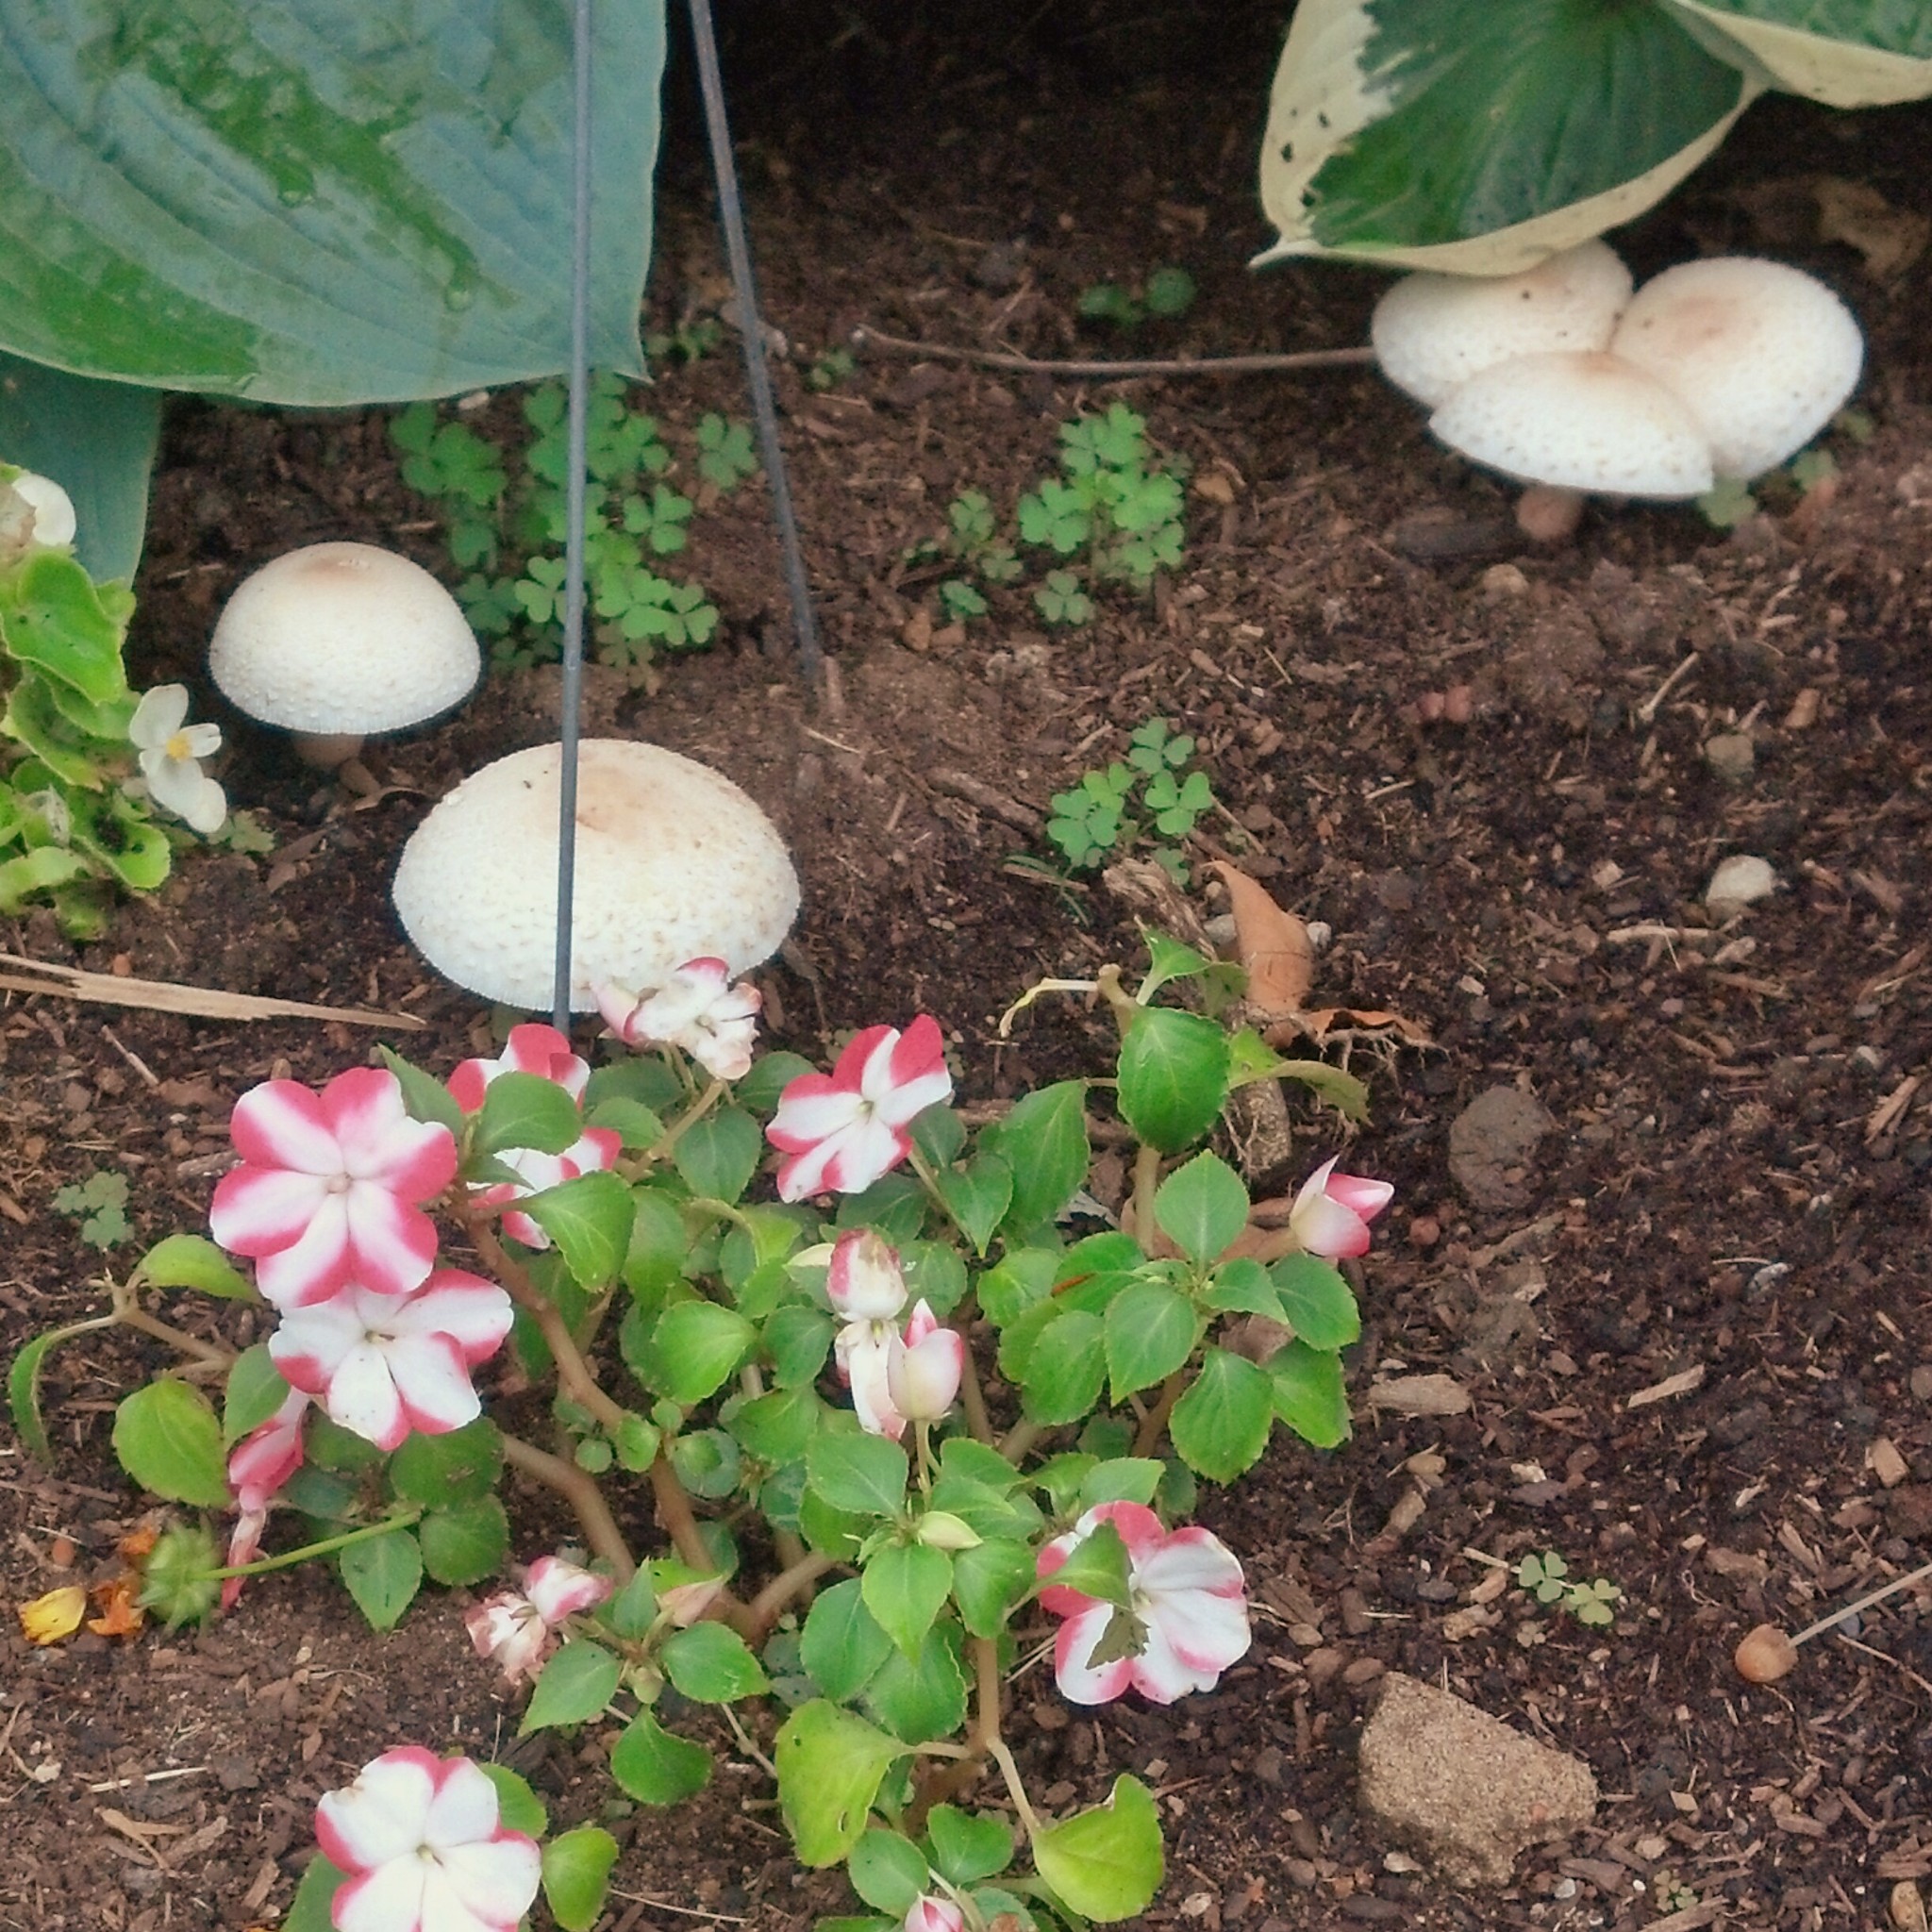
Not much to report, except that I was weeding the other day and came across these!
Yipes! Those things were huge! I don’t know what I’m going to do with this garden bed. There’s no telling what will come out of it. Ugh. Good news, though, my Impatiens are doing beautifully and starting to really fill in! Yay! Off to finish painting!
Friday night, I indulged in a fun evening of painting at Paint By the Glass. I’ve gone three other times, the last one being to paint a vibrant color rendition of Union Terminal in downtown Cincinnati. This time, my mom joined me to paint Van Gogh’s Starry Night.
We have been so excited to do this one. In case you don’t know about Paint by the Glass, here’s the gist. A “class” is held and people can sign up to come to a specific painting class. The painting is sketched out on the canvas and the artist instructs and demonstrates for those in the class. They serve wine and such as well as hors d’oeuvres. You can read about my first visit here. I’ve gone with friends and also by myself and enjoyed myself in both settings. I’m not usually intimidated by flying solo for an evening.
Sampling of the paintings they do in the class.
Some of these I hadn’t seen before; I would love to do the butterfly and flower one at the bottom!
Nothing like well-loved brushes.This is probably my new favorite thing! If only it didn’t come in a plastic bottle!
They always start you off with a blank canvas and the picture sketched onto it. This is the first time I’ve ever seen them give any guide to the colors and such on the canvas, but it was very helpful since there was a lot going on with this painting.
Blues are fun. This painting took a lot of blue. I mean, A LOT of blue. And yellow, but that comes later. You always start from the furthest thing back and come forward in the picture. We were supposed to do it all in flat colors, but I wanted to make mine with a little more texture before putting on the etch strokes. I like how it turned out.
Cloud etches, purple mountains and swirls in the skyYellow!
I wish I had paid closer attention to how big the yellow circles were and actually closed them in a bit with the blue, but it turned out alright having really large moon and stars. Making the swirls within the stars was probably my favorite part.
My final product! ‘Twill look great in The House!
I love how my tree and village turned out on the bottom. I had so much fun painting this! I think I do a lot better with more abstract painting. There aren’t as many rules, but I love coming to these classes and learning little tricks here and there to be a better painter. Kat and Ashley were the instructors that night and they were so helpful. We had such a large class that both were painting a canvas and walking around to help.
Well, you already know that I’m a pretty big nerd, but I do get it honestly! My mom loves to watch the show Doctor Who and got me hooked on it as well. One episode, I think last season, had The Doctor and companion Amy go back to visit Vincent Van Gogh. Afterwards, when they were in a modern art gallery, they looked closely and found a Tardis (his space ship) tucked into the painting. Mom was really keen on duplicating that into her painting. She got the basic shape down and then Kat (a fellow Whovian) helped fill in the details. Mom is so excited for her painting now.
Check out my previous review of Paint by the Glass here!